Domke Wrap Update

I promised an update about the Domke 19” protective wrap. I bought one with the intention of trying it out as a hood / shelter for when it is raining, and in particular, to see if it is rigid enough to act as a cover around a set of filters on the front of the camera.

I took the Domke to Iceland with me. We didn’t have much rain during our tour (the sunniest days I had experienced), but when it did rain, it really rained. So on those very difficult rainy days I tried out the cloth.

My opinion about any new gear, is that you have to use it for a year at the very least. Making a decision about something after just a few uses has proven to not be objective enough for me in the past. The ball head I thought was great for instance, turned out to have too short a clamp for my camera bracket and I lost my camera to a river. The bag that I did not like because I thought it was simply too big for my filter set has turned out to be one of my favourite bags of all time (Kinesis 10 filter bag). It is always the things that I did not consider that trip me up in the long run. I have also learned that the things I will find a ‘feature’ rather than a ‘bug’ only surface over repeated use.

Right now, I think the Domke has the potential to be a cloth I will keep on using. In Iceland I found I got shots I would not have in the past. Using it as a hood was stable enough in moderate wind, and it prevented rain dripping down the filters - particularly if the rain was coming from behind me (which for some reason is usually a rare event!) and the sides.

To make the cloth rigid, I tuck one corner of it at the top : see the above picture. The cloth has a plastic membrane on one side which I found to be 100% waterproof. The red felt / velcro type surface doesn’t get too damp either, and so the structure of the cloth is that it can be folded into a certain robust shape that will stay in moderate wind.

Of course, nothing will protect filters from rain coming towards the filter, but I did find that the reduction in rain hitting the filter from the top, sides and behind, was reduced by 100%, and once the filter was installed, I didn’t have to worry much about the front of the filter. I found I only had one surface to worry about, which was always what I was hoping this cloth would provide, and it did provide this.

On cleaning filters in the rain: to dry a filter in wet weather, use a chamois leather cloth. It is the only thing I know that will suck up all the rain and wipe the filter clear). I have tried micro fibre cloths, and lens cloths and tissue and none of these actually remove the water, or they produce a smear. A chamois removes the rain and leaves the filter mostly smear free.

I also found operating the camera once the wrap was installed was not much of a big problem. The cloth has velcro corners and you just unstick one to re-adjust the tightness. It’s very quick and easy. I had been concerned that I might undo it all to get access to the shutter button or film wind controls - I would say that with practice, you will find a process that works for you whereby you don’t need to do much to your camera (using a cable release for instance), but when I did have to undo the wrap to gain access, I could loosen it off enough and velcro it to a new position to allow my hands in.

Additionally, I found it was just a great way of being able to cover the entire camera when moving around. I could un-tuck the top flap, and bring it down over the entire filter set, and velcro it in place. The entire camera and filters were securely covered from any rain as I walked around the landscape looking for another shot.

The wrap was originally designed as a protective cover - something you can put around your ball head for instance, so there is sufficient padding and keeps it away from the dirt and rain. It is also just useful in the bag for things you feel you’d like to have some protection around. So even if it does not work as a rain filter, it is still a valuable tool to have. In fact, I would suggest that buying the 11” or 15” Domke protective wrap for your ball head is a must. Particularly if your ball head is sitting in the back of a car or getting thrown around on a tour or workshop. The wrap that I am reviewing here is the 19” one, which there is more about below.

Perhaps in a few years I may decide the Domke didn’t work in the long run. I might find the material gets too soft over time, as new, it has a certain rigidity to it. But right now, I am keeping it packed in my camera bag as I think it helped me get around 25% more images that I wouldn’t have been able to shoot in Iceland.

If you are considering buying it, there are three sizes that I know of: 11”, 15” and 19”. I bought the larger 19” model. I would recommend you get that one as it is big enough to wrap around the entire camera body and filter set. I am sure the 13” version would not be large enough. I have also placed an order for the 11” wrap, as a second wrap for my ball head when putting it in the boot of my car.

Portfolio Development class 2022 - Six Images

I’ve finished working on my new video class. The first class will be published 2nd December. The class is now available to register for.

I’d love to offer a portfolio development class each summer while I am taking a break from my workshops. My view is that even if you’ve done the previous portfolio class, there is much value in repeating the same concepts and theories with a different set of images. Attending one class does not make an expert.

I have found that my 5-day Digital Darkroom workshop that I offer, many participants come back to repeat the class, and have told me that they find it a ‘good refresher’ to do each year.

If I had my way, I’d prefer / love for all my workshop participants to come on my Digital Darkroom workshop, or to attend one of these on-line tutorial classes, because then it would make for easier communication on my regular workshops. I think this is the foundation of what I do.


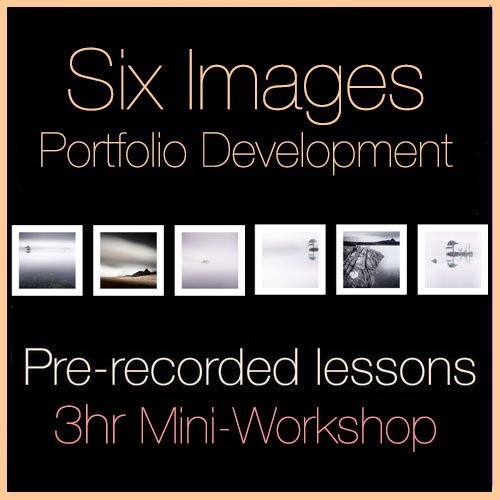
Six Images - Portfolio Class 2022

Portfolio Development 3-Lesson Mini Workshop

3 x 1-hour lessons on the art of building a cohesive set of images.

Price: £175

Recorded Lessons Package

This course consists of nine videos, and three Q&A sessions. You will learn how to edit and ‘tune’ your images to make a cohesive set.

Lesson 1 - Foundation

Containing 4 videos (total time 40 minutes)

This session contains four foundation classes on the concepts of editing.

1. editing in a nutshell
2. obtaining smooth tones & depth
3. compositional focus
4. creating 3D space

Q&A for Lesson 1


Lesson 2 - Four Images

Containing 4 videos (total time 1 hour)

This session contains four videos, each 15 minutes long, for each image edited and discussed.

1. Image One
2. Image Two
3. Image Three
4. Image Four

Q&A for Lesson 2


Lesson 3 - Final Images & Portfolio Tuning

Containing 3 videos (total time 1 hour)

1. Image Five
2. Image Six
3. Portfolio tuning

Q&A for Lesson 3

Six Images - Portfolio Class 2022
£175.00
One time

When is 'neutral' neutral?

A few weeks back while I was running a workshop, we noticed as a group that my 3.0 (10 stop) ND filter from HiTech had a more blue cast to its physical appearance than another one brought along by a participant.

I did some quick tests and discovered that they did not render the same. I had been under the impression since buying my original filter back in 2018 that it was colour neutral, and if memory serves me right, Firecrest took great pride in promoting that their filters were neutral.

Firecrest 10 stop filters. Left one manufactured in 2022. Right side filter manufactured in 2018.

I came home with both filters, as both my participant and I could not remember which filter was who’s, and I wanted to contact HiTech to see if they would replace the filter that I think has a pronounced blue cast. Here is a sample photo taken that shows my old 2018 filter has a pronounced blue cast, and is also a stop or more darker than the new filter. I made both exposures at the same shutter speed and aperture:

Left side of composite image is the 2018 10 stop ND. Right side of composite is the new 2022 10 stop filter.

HiTech have chosen not to replace the filter, and claim that the 2018 filter is within tolerances. They have asked me to point out that my original filter is from 2018, and that they have offered a free of charge laboratory testing on the filter.

On the positive side, it is good to see that their filters are improving and they are more neutral than they were. On the downside, I am disappointed. It is clear that their original filters weren’t as neutral as I had hoped, and that their stop rating is not that tight either. I suppose one can say that not all filters will be equal, and that there must be a tolerance. It’s just to my eye: I think there is quite a blue cast to the original filter. As for offering to do a laboratory testing for me: this will prove nothing for me, except that I have a filter that I deem unusable but somehow is quite within the tolerances that HiTech have for their products.

Perhaps the give away from all of this, is that it’s always worth testing out your filters to find out how they perform, and to understand that there are certain tolerances in filter production. 10 stop does not mean 10 stop, and neutral does not guarantee neutral colours.

I have since had to do a filter refresh. I tend to kill filters / damage them from my intensive schedule. I have chosen to try out the Kase ND filters. I must stress that this is NOT in response to HiTech’s response, as I was pretty happy with their filters for all this time (my Velvia film of choice has a lot of blue in it), so I think this is why I did not notice the cast.

If you would like to do a review of ND filters, I would recommend going over to OnLandscape / Tim Parkin’s site as he has made some extremely detailed analysis of filter neutrality. Tim has kindly offered two links that are free of charge, as his online magazine is a subscription model.

onlandscape.co.uk/2018/11/graduated-filter-colour-accuracy-testing

onlandscape.co.uk/2019/05/graduated-filter-test-part-four

Tim says that these cover colour accuracy and an overall score part. The other parts
that are paid cover things like sharpnes, water shedding, etc

Driving in Iceland

I’m in the central highlands of Iceland right now. I’ve been coming here, offering a tour since 2016. I think this is my last tour for a while, as I need to give it a rest, and do something new next year. Anyhow, my guide allowed me to drive his vehicle this time round.

His car is a Ford F350 customised by sawing it in half, and bolting on the back of a Ford Excursion. It has six doors, and raised foot plate.

This video shows one of the ‘roads’ in the highlands: a river. I’ve been through this many times.

As much as I love the highlands of Iceland, I need to give it a rest now. After seven years, I need to go and do something else for a while. So next year I think my guide and myself will be working on a new tour.

I will return to the central highlands for sure, but I need some time away now. I don't ever see a time when I won’t be working in Iceland. It has become part of who I am. I have been coming here since 2004, and although I run two tours a year here, I often come to do my own thing as well.

Last September while running the tour here, Daniel Bergman said that I was an honorary Icelander: A huge compliment. My parents are highlanders from Sutherland in Scotland. My blood and my heart are from there. I feel a connection to Iceland because it is not only a beautiful place, but there is something similar in its raw nature to that of the Scottish Highlands. Perhaps I have just found somewhere that is a home from home? I don’t know. It is just a special country.

Many thanks to my guide and friend Haukur for trusting me with his amazing vehicle.

Domke Protective Wrap

Last week on my Eigg workshop, Sureita turned up with a small protective wrap by Domke which she was using to cover and protect the tripod cube that she had brought along. This I believe was the small 15” version of this cloth.

I noticed there is a 19” version available so I bought a couple to try out. I’ve experimented at home and I see that the cloth has a plastic membrane which is waterproof on one side, and a felt-like material on the outer. It has velcro on each corner of the cloth.

It appears as though it might be a great accessory for when it’s raining. As I can wrap it around the camera, and tuck in one of the corners at the top to give it more stability. I can even use it as a hood for my filters, which might stop the rain from dripping down the back of the filter.

I’m off to Iceland next week for 10 days and will try this out. Perhaps it’s not suitable. I just don't know yet, but I think it’s rather good for general protection anyway. Let’s see.

Japan are to lift remaining tourist restrictions this October

Japan are due to lift restrictions further this October. At present, it is not possible to go to Japan as an independent tourist without the aid of a recognised travel agent. Plus you have to send your passport to the Japanese consulate.

I am now busy re-instating the Hokkaido tour I had hoped to operate the past few years, for this January 12 to 22nd. We’re now busy looking at the hotels and I hope to have the tour arranged and advertised hopefully by the end of this month. The first announcement of this trip will be put in my monthly newsletter.

Eigg

I’m just home from my workshop on Eigg.

I love going there, and I was searching today and found this video of my friend Charlie. I met him for the very first time this April while I was there. I had booked a bothy on the opposite side of the island and thought I would cycle across to the beaches each day. Only to find that the roads are pretty bad and lumpy. So I phoned Charlie, and he became my wee taxi each morning to the beaches.

Ok so no big deal to arrange a taxi, except that when I phoned him and put it to him that I’d like picked up at 5am, he was ok about it - but a bit stunned. Who would be wanting to go anywhere on a 5 mile island at 5am?

We became good friends, and he often gave me a wee dram of whisky each morning on my way to the beaches.

I love going to Eigg. Currently, as it stands, I think next year is my last year running workshops as the place I stay are are considering retiring. But I know I will continue to return on a personal side, besides, I haven’t shot any images on Eigg myself for quite some time. It is about time I do my own work there.

Six Images update

Work on ‘Six images’ has been going well. I now have seven short videos finished. I have a further 4 left to do, and since I am on a workshop next week, work will resume on these once I am home.

Teaching can teach the teacher so much.

For the past two years I’ve tried several formats. The first year I tried to do the classes live, but there is just so much preparation, not to mention technical difficulties, and also nerves, It was difficult. Last year I settled on 1 hour pre-recorded classes, with a week to ask questions which I would then produce a further Q&A video about.

It worked well, but I am doubtful as to how many folks had an hour to listen to me drone on? :-)

So the format this time round is several 12 to 15 minute videos (that’s just the way they were turning out), and I think these ‘bite sized’ tutorials are more appropriate.

This is what I have so far:

  1. Editing in a Nutshell (a distilled version of all my digital darkroom stuff)

  2. Obtaining smooth tones & depth in your images (how to prepare your files for editing)

  3. Creating compositional focus (how to lead the eye)

  4. Creating 3D perception (photographs are 2D by nature, and so we need to use techniques to imply a sense of depth to the work)

And these are more or less the preamble :-) Foundation stuff. But I feel I got the message simpler in these. As I say: teaching can teach the teacher. I have learned so much about my own photography by having to sort out in my mind what I want to teach others. Sometimes you find yourself offering an answer to a question that you didn’t know you knew the answer to :-)

The last set of videos are per image. Each image takes around 15 minutes to dissect and explain the edits I applied.

I’m also hoping to put one further video together regarding ‘fine tuning’ the collection as a set. In musical terms, this is one of the main tasks of ‘mastering’. The mastering engineer takes all the songs for the album and ensure they sound consistent - similar volumes, similar tonality (some tracks may need more treble / bass or less). This is done so the entire set can be played right through with consistency. That’s what I do for my ‘set’ of images. I fine tune the tonalities.

I think I will have the last few videos complete in a few weeks.

I hope to offer this as a class towards the end of November / December, as I need to work it around my real-world workshops. Feeling very good about this work.

Editing on an uncalibrated system

This past April, I ran my Digital Darkroom class. We had snow, rain, fog, and just about everything else weather wise. I have a little place on the edge of Loch Maree that I use for compositions, and to get some material for the class.

Anyway, during the class, I work on one of the best digital projectors - a Canon Xeed. But I always find that although its shadow detail is quite good, it’s nowhere near the blacks that one can get out of a well calibrated monitor.

Richard McDonald and I made the image above. The left hand side one is the image that was edited during the class, and the right-hand edit is the same image ‘colour corrected, and graded’ on a calibrated screen at home.

I am always fascinated that an image I feel is ‘finished’, can in fact, turn out to be unfinished. I have this problem with my own work, which is why I like to let it sit for a while. The human eye is capable of lying to us. It is highly adaptable and will ‘remove’ colour casts, and also convince us that the luminance values in the image are sufficient, when in fact we may be only half way there.

Each time I do my own edits, I like to open them up and compare them with work that I know has the correct luminance. In audio mixing, sound engineers will often compare the mix of a song they are working on against a song that is already published and mixed well. It will show discrepancies in their mixing.

For me, I often find that my eye tells me things are bright enough when I may only be around 75% towards absolute white.

Image © Digital Darkroom workshop participant Richard McDonald

I think the revised edit of Richard’s image is much better. But I know I couldn’t have done it on the uncalibrated system - which is why getting your screen calibrated is vitally important, but also, I know I couldn’t have corrected it so soon to the initial edit. By leaving it for a while, I have been able to note that there was a distinct green cast to the image, and that its luminance values were a little on the muddy side.

Oh, one last thing: note however that even though I was working on an uncalibrated system, the luminance relationships between each of the objects within the frame are intact in the original image. I did not need to do any drastic adjustments in the corrected version. I find this very interesting. It tells me that I got the relationships correct, even though I could not determine the true blacks and whites of the actual image.

Six Images - Online Class update

I’ve been working away this past month on my new on-line workshop that I am going to hopefully offer later this Autumn. The class so far has three videos made, and I think there will be five in total. Some of the videos are very short at around 10 minutes each. Just the right length to get the message across, and so that folks can replay them as a refresher, without having to commit too much investment in time and brain cells ;-)

The titles so far are:

‘maintaining smooth tonality whilst introducing depth and punch’

‘conveying a sense of 3D’

and

‘Compositional Focus through tonal editing’.

These are all primers that are useful before stepping into the longer video about the six images I want to discuss. Work is going well, and I’m now starting to feel that it is all beginning to tie up quite nicely.

-

postamble:

Lastly, I have to say that producing videos is extremely slow and time consuming. If I get 10 minutes worth that is well recorded and edited done in one working day, I’m doing well. I have full absolute respect for those who produce YouTube content. The audience if fickle, easily distracted, and if they don’t post regularly, the algorithm buries them. So there is a treadmill there. It must be a lot of high pressure. I am sure that many of the 10 or 20 minute videos I watch take more than a week or two to produce.

There is also a massive learning curve in production values, storyboarding the video, recording it, and editing it. plus, you’ve got to be comfortable in front of a microphone. I’m still struggling with that one: as soon as I begin to record my voice, I almost inevitably get my words jumbled up, trip over myself, or find myself using the wrong word. So many retakes…… and after a while fatigue sets in. And the takes just get worse. So recording takes while rested, and fresh is advised.

My initial hope had been that I would now produce one video class a year. Initially I had thought about producing a portfolio class each year that covers a new set of work each time. Perhaps I might come back to that, but man, it’s very intensive, and requires a lot of planning.

I hope to have the new class ready by mid Autumn if all goes well.