Today I was chatting to the editor of a major photography magazine and he was asking me why I had decided to start working in black and white. The correspondence was on e-mail, so I wrote down very quickly for him my thoughts on this, and when I read it back, I felt it would be a really good thing to post here on my blog. So below is my reply, which I hope may give you some food for thought about colour, monochrome and more importantly the relationships between all the objects present within the frame of your viewfinder.
"Over the past 5 years, I’ve spent a lot of time teaching people about landscape photography. Through the teaching, I’ve had to look at what I do and figure out just what’s going on for me when I choose a certain composition.
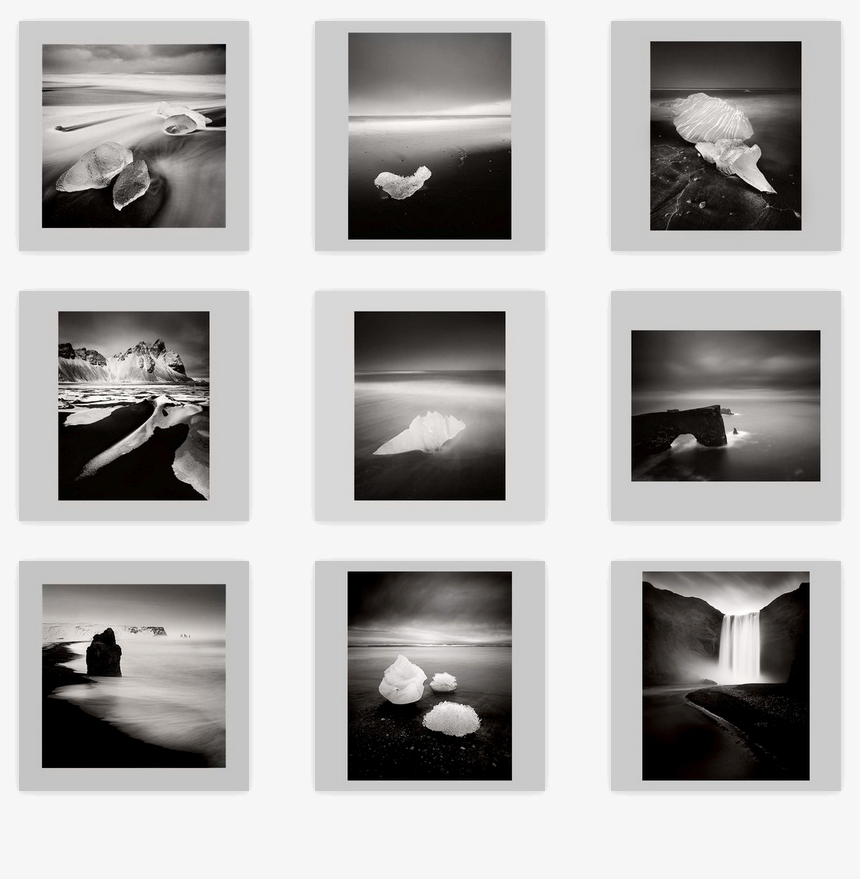
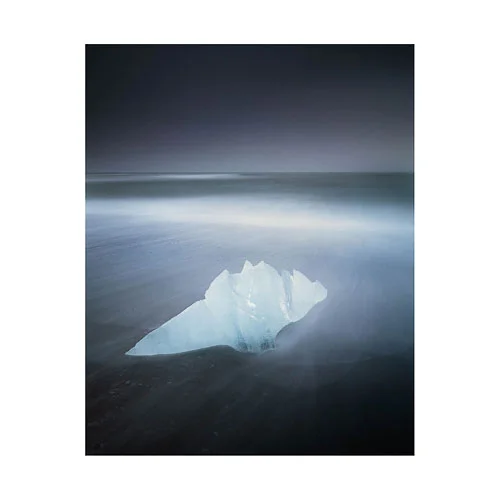
These images all started out life as colour images. Through working in a monochrome landscape such as the black beaches of Iceland, I learned a great deal about tonal relationships. This has, over the years trained my eye and I think when I compose in colour, I'm very aware of tones and their relationships, which is why I think these converted straight into monochrome with little or no further editing.
"In the past few years, I’ve found I have started to talk more about tones and their relationships in the frame. As a way of helping others think more about composition and what they’re putting into the frame of their viewfinder, I’ve asked them to consider if certain tones merge when put side by side, and also if some tones compete for attention with other tones in the same frame.
"My feeling is that black and white is harder to do ‘well’ than colour is. Many may disagree, but I feel that with colour, you can have lots of tonal ‘errors’ in the frame and you still get away with it because you’re distracted by the colour elements. With black and white you’re only dealing with one thing and although that may seem much simpler, it actually means that any errors you get in tonal relationships really stands out.
"What I found was, that many of my existing colour images worked really well when converted straight into black and white with little or no editing involved. I think that’s because for a long while, I’ve been composing my images with tonal relationships in mind. My style of photography is of a more ‘simplified landscape’ and when you reduce your compositions down to more basic elements, you’re forced to look at tonal relationships more than if you were simply trying to cram a lot of subjects into the same frame.

Bolivia was where i felt I started to work with more simplified compositions, simply because the landscape has so much space to it, you can't escape it if you work with what's given to you.
"So for me, the path to black and white started when I began to shoot more simplified colour landscapes. I found that understanding the different tones and their relationships between the objects present in the frame has been a great primer or foundation for beginning to work in black and white.
I’m often surprised that when someone has an images that doesn’t work in colour, they feel that a simple way to fix it is to turn it into black and white. As you and I both know, good black and white work is extremely difficult to pull of well. The key word here is ‘well’. I think a lot of people are happy when they turn something black and white, but it takes a lot more to make it special, and a good understanding of form and tonal relationships is behind that".