Grasleysfjöll Inversion

Like a surreal night scene.
Or perhaps a view from standing on the Moon.

Some of my images work very well when inverted. Others do not. This one of a mountain range in the central highlands of Iceland works very well.

Inversion-Grasleysufjoll-1.jpg

Shot in the depths of winter when there are no roads, nothing to speak off, I noticed that the wind had swept part of the mountainside off. We saw just faint black lines hovering in space. I asked my guide / driver to take me closer (we were on a valley floor) only to find he went much further than I thought we could - he took the vehicle up the side of the hill in deep snow to the brow of the hill. This photo was made from just a few steps outside of the car.

The inverted photo has a completely different meaning for me. The feel is completely different and it almost feels as though I am standing in some surreal night scene, or perhaps standing on the Moon.

Breaking the spell / building a new one

Motifs are very important in my photography.

I can see them more clearly when I remove the ‘landscape’. When I remove the auto-response to go ‘this is a picture of a piece of reality’.

Inverting an image of scenery forces the viewer out of their comfort zone.

It helps to break the illusion or spell that photos are ‘real’. They’re not. In the place where ‘reality’ existed, there now exists an abstraction. One that hopefully casts a new kind of spell over us.

Hokkaido-2018-(20).jpg

Inversions

We should all be pushing the boundaries of our work. We should be trying to push the boundaries of what the norm offers. We can grow so much by entering areas of photography that we have not visited before.

For me, I’m more interested in the edge of reality, of the edge of definition. By inverting my photos I have broken that spell that says ‘this is a capture of reality’, and set a new contract between the viewer and myself. The work is no longer verbatim. Instead it is much more open to being interpreted in any way possible.

Inversion.jpg

You may dislike the work, or find it too strange. But I think that’s good if it generates that kind of response.

For me, I’m just exploring. I have yet to reach an opinion, and indeed, feel that trying to strive for one so early in any direction or path I take would be a bad move.

Right now, I’m just enjoying seeing familiar work anew. I’m noticing different things in familiar images but most importantly, they feel quite different. There is a different atmosphere to these.

Art, photography, craft, whatever you call it. It is allowed to be transient, to be a product of the moment. Why does everything have to be produced with the intention that it last forever?

Grads still have a place in digital photography

Today I’d like to discuss the validity in still using Grads in an age where digital cameras have so much dynamic range that many believe that grads are no longer required. To do this, I need to go over what happens to the exposure when we apply grads.

Yesterday I discussed why using Aperture Priority is better than using Manual, particularly when using grads. Aperture Priority automatically re-balances the exposure as the grad is applied:

exposure-grads.jpg

As you can see, the grad reduces the difference in contrast between sky and ground. And since the camera wants to take an average between the two values, we find the sky and ground moving towards mid-grey (18%).

In the above illustration you can see that the ground values are now lighter once the grad has been applied. This is key to my post today. When you apply grads, what you are essentially doing is opening up the shadow detail in the histogram / exposure of the photo.

sky-ground.jpg

Consider the histogram on the left. No grad was applied, so we end up with a classic ‘double humper’. The ground has been squeezed into the lower tones of the histogram while the sky has been squeezed into the upper registers of the histogram.

Note where 18% grey is.

The ground is essentially underexposed, while the sky is overexposed.

Also consider that the ground is residing in the shadow ‘darker’ area of the histogram. This results in loss of tonal information in the shadows as many dark tones are being quantised. Many tones become one.

Now let’s consider the same image shot with a graduated filter:

sky-ground.jpeg

The ground values have been moved towards the middle area of the histogram. Same for the sky values. The important points to consider are:

The shadow information has been opened up (marked in red). We now have more tonal information stretching over a longer tonal scale way down into the shadows.

The highlight information has also been opened up (marked in red). We now have more tonal information stretching over a longer tonal scale way up into the highlights.

For me, the main reasons why I use grads are:

  1. I wish to avoid underexposed ground and overexposed sky

  2. I want to go home with a pleasing negative to work with.

  3. I don’t want to have to jump through additional hoops in the processing to figure out if the image is any good. Working with an image where the sky is overexposed and the ground is underexposed isn’t very inspiring at all !

  4. if I didn’t grad, I’d have to process every file I shot to see if they were any good before I began work.

  5. Working with a nicely balanced exposure straight out of the camera can be, and often is, a very inspiring way of working. You can see straight away whether the composition and image works or not, and I remain engaged.

Engagement is the key for me.

I don’t want to struggle with bad exposures to make them nicer. I want to work with images that inspire me, and that means pleasing, balanced exposures.

If I go home with a nicely balanced exposures, I am more likely to work with them. Conversely, having to trawl through hundreds of images with dark foregrounds and bleached out skies wondering if they might be good once I’ve put them through my editor of choice isn’t going to fuel my creativity. And it’s certainly not going to inspire me.


Light meters are dumb, they just try to turn everything 18% Grey

This is not a complaint. It’s just a fact. And something we all need to understand about light meters.

Here are some fallacies:

  1. There is such a thing as the correct exposure

  2. Metering something gives its correct exposure

Here are the truths:

  1. Metering something gives the exposure values to turn it 18% grey

  2. You choose which part of the scene is turned 18% grey, and let everything else transpose around that.

Why 18% grey?

There are a number of reasons for why 18% grey was chosen:

  1. A light meter has to set the exposure for something. So an average value is as good as any. Most things look about right when exposed as an 18% grey subject.

  2. The human eye perceives most things as a mid-tone.

With point 2, let’s consider this some more. If you point your camera down at the ground and take a shot of your feet, and check the picture, the image will look about right. If you also check the histogram it will be right in the middle of the graph. The shot has been exposed as an average (18% grey) and it looks about right. Now do the same with the sky. Point the camera right up at the sky so the entire sky fills the frame and take a shot. The photo will look about right, and guess what: the exposure will be right in the middle of the histogram. Another 18% grey exposure.

So the human eye tends to perceive most things as an exposure around 18% grey. Knowing this, and also knowing that your light meter is trying to turn everything 18% grey is useful.

For me, all I need is Aperture Priority and Exposure Compensation. When shooting a scene I let the camera work out the average value (18% grey) and if I feel it’s underexposed (as will happen with snow white scenes as the camera tries to make the snow 18% grey) I can apply compensation of maybe +1 or +2 stops.

Exposure is pretty simple. Camera light meters are really dumb. They just try to take an average all the time and make the scene 18% grey. There is no such thing as ‘the correct exposure’, and the meter reading you get is the values you need to turn the subject 18% grey. That’s all a light meter does.

Graduated filter update

The post below first appeared in April of 2016. Since then, I’ve been using the Medium grads extensively along with hard grads. I’ll explain at the end of the post below, why I have settled on medium as well as hard grads. Here is the post from April 2016:

Lee filters introduce two new graduations of ND filter

In April,  Lee-Filters announced two new graduation sets to their ND product range. Up until now, you had the choice of either soft-graduation or hard-graduation ND filters. Now you have two further choices - very-hard-graduation and also medium-graduation filters.

Lee filters have just introduced a new 'very-hard' and also a new 'medium' graduation filter set to their existing line of soft and hard ND-grad sets.

Lee filters have just introduced a new 'very-hard' and also a new 'medium' graduation filter set to their existing line of soft and hard ND-grad sets.

I currently own the 1, 2 & 3 stop versions of both soft and hard-grad filters. They are useful in many different ways. But with the news of the newer graduation types, I think my filter set is going to change.

Soft or Hard, which should you choose?

Each year when I send out my trip notes for the workshops I'm running, I ask everyone to buy the hard-graduation filters. Despite some participants reluctance to get the hard-grads because they think the graduation may be too obvious (it's not) in the picture, I find the existing Lee hard-grads just about right for most applications.

The reason is that Hard grads are actually quite diffused once they are put up so close to the front of the lens. They give enough bite to change the picture, and do so without being too obvious where their placement is. They are perfect for when you just want to grad the sky only.

Soft grads on the other hand are too soft for just grading the sky - their bite doesn't cut in as much as I'd like. But I do find that Soft-grads have other uses: they are ideal for instances when there is a gradual change from the bottom of the frame to the top. Instances like lakes where the water is extremely dark at the bottom of the frame and it gets brighter towards the horizon. Using soft grads across the middle of the water help control that.

So in general: hard grads are for controlling the sky when there is a sudden shift between ground and sky. Soft grads are useful for scenes where the entire scene changes gradually as you move up the frame.

Grad Placement may not be so critical, and here's why

It really depends on the focal length. Smaller focal-lengths provide a sharper rendering of the graduation whereas larger focal-lengths diffuse the graduation, making hard-grads softer.

If you zoom out - the graduation becomes more defined. And as you zoom in, the graduation becomes more diffused. With a hard-grad it means it's a hard-grad at 24mm but it starts to act more like a soft-grad when used at 75mm. Soft grads are soft at 24m but they become far too soft once you get up to and beyond 75mm.

I illustrate this below. Using the same hard-grad, I zoom in from 24mm to 150mm. As I do so, the graduation becomes softer. I am essentially zooming into the graduation:

Using the same hard-grad, as I go up the focal lengths from 24mm to 150mm, the graduation becomes more diffused. My hard-grad essentially becomes a soft-grad at 150mm.

Using the same hard-grad, as I go up the focal lengths from 24mm to 150mm, the graduation becomes more diffused. My hard-grad essentially becomes a soft-grad at 150mm.

I have a medium-format rangefinder system. I can't see through the lens, but I've never had a problem with placing the hard-grads, and it's all because of a combination of them being so diffused so close to the lens, and the higher focal lengths. My wide angle is a 50mm for example.

Which Graduations should I choose, and why?

Your choice of camera format will also determine how your grads will behave.  Smaller-formats user smaller focal lengths, while larger formats use larger focal lengths for the same angle of view. For example, a 24mm lens in 35mm format has the same angle of view as a 50mm does in medium-format. But the same grad used on a 24mm will be more defined than if it were used on a 50mm, even though both lenses give the same angle of view.

In the graph below, I show the equivalent focal lengths for the 'same angle of view' as you go up the formats from MFT (Micro-Four-Thirds) to Large format. You can see that the focal lengths get longer and longer. This means that your soft-grad filter will become softer and softer as you move up the formats.

As you go up the formats, the focal lengths get longer for the same angle of view. This also means that any hard-grads you buy become softer as you move up for camera formats. Or harder as you go down the formats.

As you go up the formats, the focal lengths get longer for the same angle of view. This also means that any hard-grads you buy become softer as you move up for camera formats. Or harder as you go down the formats.

So it's not just a simple case of choosing soft grads over hard ones, because you think they will be less noticeable in the final image. You also have to take into account the focal lengths you're using.

In my own case, I use Medium Format cameras, and I mostly use hard-grads because they give me the right amount of graduation across the frame for the focal lengths I mostly use (50 and 80). When I use the hard-grads with the 50mm, the placement isn't so critical as there's a degree of diffusion there already, but the filter still bites into the image enough to make hard-grads a viable choice. When I use soft-grads though, they tend to be too diffused for the focal lengths I use. 

Which of the new range will I be tempted to get?

Since I'm a medium format shooter, I'm tempted to replace most of my soft-grads with the new medium grads. The medium-grads will give me what I am looking for (but not getting) from my soft-grads.

I will remain using the standard hard-grads, as they are perfect for my wide and standard lenses, but I am interested in buying some very-hard-grads for use with my telephoto lenses. As explained, when you get up to such high focal-lengths, hard-grads become less and less effective.

Using different types of graduation is a key component to good exposures. I've found for many years that I could do with some graduation filters that are somewhere between the old hard-grad and soft-grad sets, and there is also cause to have very-hard grads for use when using higher focal lengths. So for me, I will be buying some of the medium-grads and very-hard grads to compliment my ever-growing set of ND filters.

January 2020

As of January 2020, I’ve had time to use the medium grads now for just under four years. I find them indispensable as part of my set of grad filters. I use medium and hard grads just as much in the field and both are used for different reasons that I can summarise as follows:

  1. On longer focal length lenses, hard grads are always required. Zooming in just diffuses any graduation of any kind so they act more like a soft grad when you get up to the 100m focal lengths and beyond.

  2. Hard grads are useful from 50mm to around 150mm. Go wider (below 50mm) and hard grads become too hard.

  3. Medium grads are useful with very very small focal lengths (below 50mm). As you zoom out, the graduation becomes more defined. So medium grads give sufficient feathering.

In summary, medium grads at the right focal lengths do what most of us assume soft grads will do. They are really useful in empty areas of water and sky where we need some bite into the photo without being overly obvious. Using hard grads in empty areas of the photo can be too obvious.

I haven’t tried the very hard edged grads - I feel these would only be of use on longer focal lengths (100m and above). As my article stated above - as you zoom in, the graduation becomes more and more diffused. Hard becomes medium, and medium becomes soft. Soft becomes ineffective.

I have rarely found much use for soft grads. They are simply too soft once placed up close to the lens and the graduation becomes so diffused as to make little to no difference to the photo. Indeed, I find myself often placing soft grads so low in the frame in an attempt to make them bite into the photo that they end up just darkening the whole scene as if they were a full ND.

Hard and medium grads are the way to go. I use both and have all strengths from 1 to 3 stops.

Grayson & Chris

Today’s post is nothing to do with photography. But instead, I wanted to show you this because it moved and inspired me. It put a big smile on my face.

I loved watching these two very special bro’s hanging out together. Both very special people.

Chris has a natural aptitude for communication with people who have a wide variety of special needs, and it’s clear to me that his work comes from the heart.

Grayson is a very special boy. What a fantastic personality! He gives out so much love, and is so loved. It made me feel very privileged to watch this buddy chat.

Thank you Grayson and Chris!

3rd biggest challenge: removing the urge to impress

Dear reader, before I begin my post today, I wish to state that when I write entries on this blog, they are often written with the intention of stirring some inner thoughts within you. My aim is to help rather than dictate. My view is just that: a view, and often a highly personalised one.

Fjallabak-Sept-2019-(4).jpg

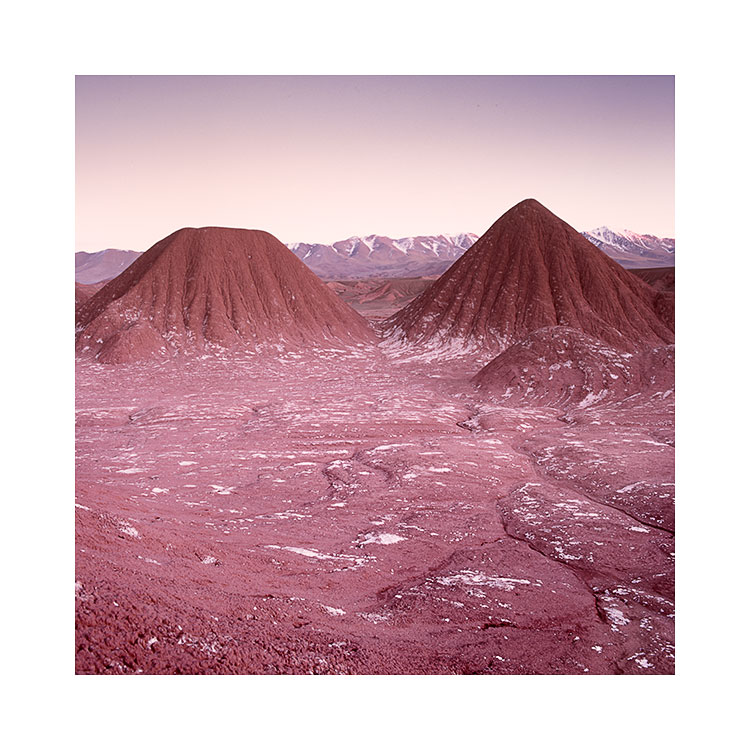
Over the past few weeks I’ve written a few posts about the main obstacles that we have to overcome as photographers. They are:

  1. 1st biggest challenge is being original.

  2. 2nd biggest challenge is being objective about what we do.

They are as I have stated above, written to stir some inner thought. So I’d like to continue on this vein but feel I must stress that for myself, I do a lot of internalising. I find myself often questioning my own motivations and basically: why I do what I do. I’m never too clear if being too introspective is good or bad. Perhaps it’s both. I don’t know, but what I do know is that I think being aware of my own limitations, hang-ups, problems, strengths, weaknesses is a good thing. Brushing over the darker sides of my personality does not help me when creating my work. Trying to improve my process and the quality of my work often feels as if I have to do some work on myself, and not the art.

The art is a mirror of whom I am.

So with that pre-amble out of the way, I’d like to suggest that the 3rd biggest challenge we all face with our photography is in overcoming the need to impress.

It’s perhaps the most difficult to write about, without perhaps offending someone, or being easily misunderstood. My intentions are to help, not to give you a hard time, but I do think that progress is often hard, and truth can often hurt, and we all have to come face to face with our motivations if we are to be objective in what we do. It’s the only way we will know when our work comes from a good place, or when we are being overcome with a need to impress.

Sure we have to balance, measure and assess our work from time to time, but I think it needs to be devoid of considering how others may value it. If we can remove the need to impress others then I think we’re on the right path to a kind of truthfulness in our work.

Doing what we do because we love it, should come first and foremost.

Indeed, I would go as far as to say that doing what we do because we love it should be all that matters. Whether anyone else gets what we do, loves what we do, hates what we do, should not matter. Because it does not matter. It really doesn’t.

I have learned over the past twenty years from having a small profile that the comments about my work have varied enormously. All I can gather from this is that I will never please everybody and neither should I try to. I could get so lost if I tried.

I think my need to impress comes from times when I lack of confidence in what I do.

No one escapes. Not even the most professional of photographers. Everyone has low periods. Everyone has moments when they doubt what they are doing. It’s perfectly natural to have these moments. All of us, no matter how proficient, will go looking for validation from time to time.

I’ll never get away from this ‘need to impress’ rearing its ugly head from time to time in my psyche. But what I think is important is to realise that these moments are just that, and ultimately, how I feel about my work is the only thing that matters.


Camera height

I am in Hokkaido this month and I’ve been reminiscing about some of the images I have made over the past few years here, and one in particular required me to be high above the ground to accomplish what I saw in my mind’s eye.

Hokkaido-(14).jpg

This photo was made by being perched up high. While at ground level, I could see that the collection of trees in the bottom of the frame were clashing / hitting the row of trees at the top of the frame. To get the separation between them in my photograph, I had to go this height:

image-asset-2.jpeg

This is the actual photograph of me making the image you see in this post.

Camera height is often a critical part of composition. OK, my example to illustrate that is perhaps extreme, but I have had many times when I have wished to take photos from much higher than my tripod can reach to.

I have also had times when I have wished to take photos that are much lower than my tripod can compress down to. Going low allows me to compress the mid-ground, and it is also a useful device in removing any clutter or debris that is lying around on the ground. Going low also allows me to move objects that are on the ground closer to those objects higher in the frame. By bringing them together / closer, we can strengthen relationships between them.

Tripods don’t find compositions. They fine-tune them

I think camera height is an important consideration for composition. But I am always surprised to see many photographers doing this:

  1. Get out of the car

  2. Extend the tripod to eye-level

  3. Put the camera on the tripod

All of this, without really considering if the height of the tripod is correct for any possible composition they see.

For me, this is what should happen:

  1. Get out of the car

  2. Take the camera out of the bag

  3. Walk around with the camera looking for good compositions

  4. When you find a possible candidate for a good composition, try the composition from different heights: down low, mid-height, eye-level, and of course, from above my own eye-level.

  5. Once a nice composition has been found, set up the tripod to assist in keeping the camera in that ‘magic space’ that has just been found. You know - that ‘middle of the air’ place where the composition works.

So for me, having a very tall tripod is really invaluable. I have two tripods. One is over 7 feet tall, while the other is over 9 feet tall. I have used both fully extended many times, and I’ve been grateful to have the extended reach they have.

A word about centre columns

My tripods also have no centre column. For me, these get in the way and prevent me from putting the tripod so low that the camera is almost at ground level. So when I buy a tripod, I always buy one that is very tall, and also has no centre column.

There will also be occasions when you need the camera to be literally sitting on the ground. In these circumstances I take my camera off the tripod and actually sit it on the ground. I sometimes have to make a hollow in the earth to help support the camera to place it where I need to. But I also need to use a viewfinder that allows me to compose comfortably. For me, I have a 45º angle viewfinder on my camera. For you, you can either use your live-view, or buy a 90º angle finder for your camera (Nikon and Canon).

Tip: when working with cameras lower than you are : get low. That means having to lie on your tummy. You need your eye to be level with the view you’re seeing so you can balance it properly. Peering into a camera with your head sideways isn’t going to help.

Camera height is a critical part of composition. I have found many times that the same composition taken at different heights will have a ‘sweet spot’ where the height is just right for the composition to really gel.

Puna de Atacama space available

A last minute cancellation for my Puna tour has left an available space for anyone who has been keen to come on this trip.

Volcano Tour, Puna De Atacama, Argentina

Date: April 20th - 29th 2020

Price: $7,495 USD

10-Day Photographic Adventure

The Argentina area of the Atacama offers some unique landscapes not found with its Chilean and Bolivian siblings. For example, the Desert Labyrinth is a massive area of red clay mountains formed and shaped by the elements while the Campo de Piedra Pómez is many many miles of stunning pumice rock sculptures. But I think my favourite place here is the Cono de Arita, perhaps one of the most otherworldly volcanoes I've yet seen.