Winter Sunrise from Lone Pine - Ansel Adams

Preamble - I’ve written so many good articles over the year on this blog, that I sometimes find that something I wish to cover, has already been covered a while ago. So today, I am re-posting this article from June 29 2018.

As part of my Digital Darkroom and Printing workshops, I enjoy enormously showing the beautiful Ansel Adams photograph 'winter sunrise from lone pine'  to my class. It's a great illustration of the 'creative edit' and well worth discussing in detail. 

'Winter sunrise from lone pine', the achingly beautiful image with wondrous print interpretation by Ansel Adams
Image © Ansel Adams

Before I dissect the image, I am curious if you can actually see the edits that Ansel has done to the image? Are they very apparent to you? I only ask for the sake of wondering how much skill each of us possess at deconstructing an image, or whether each of us simply just 'buy it' when we look at the photograph? My own thoughts on this are that great images tend to cast a spell on us and we are too enwrapped in enjoying the spell we're under to think more about how the image is constructed. As part of our 'learning to become better photographers', I think it is natural to be able to 'enjoy an image' as well as dissect it.

I think great photographs cast a spell on us with their imagery, and whether they are 'real' or not is irrelevant. 

Ansel Adams was a great illusionist. When I look at his images I believe them, even though I know a lot of work went into the manipulation of the negative in the dark room. To me - this  is what photography is all about..

Let's break down Ansel's image into it's core parts:

lone-pine-dissection.jpg

Ansel's image can be broken down into four summary edits (I'm sure there were more, but these are the ones I see he has attempted), which I've illustrated above in different colours:

Image Analysis

Blue area:
The Sky. Which seems to have been printed with as little contrast as possible to try to reduce the brilliance / emphasis of the cloud at the far right of the picture. If the clouds had more contrast then they would be competing with the white mountain for attention, and ultimately, stealing a little bit of the mountain's main attention grabbing ability.

Orange area:
The snowy mountains and dark hill. This is the high-contrast area of the scene and the area that is the 'initial pull'. Although this area takes us into the picture, it is not the last thing our eye settles on.

Green area:
Ground area, a necessary part of the picture, because it gives us context, even though it adds little interest to the image.

Red area:
Forest & horse. The part of the image I consider the 'easter egg' - that special bit of surprise that you see after you've looked at the high contrast mountains.


Making the print

Let us now consider the image from how Ansel may have chosen to print / edit it. If I were to make a guess on what choices Ansel made, I would assume the following:

Blue area

He would have reduced the contrast here as much as he possibly could. His aim would have been to suppress that white cloud on the far right hand side of the image, so that it does not compete with the brilliance of the jagged mountain range. He wants the white mountain to be as bright as possible, and the only way to do that is to suppress bright tones elsewhere in the image. The key is - if you want something to be brighter, darken everything else around it. So I believe that Ansel has darkened the sky for two reasons: it makes the mountain appear brighter, and it also reduces the distraction of the cloud.

Orange area

This is the main part of the image: what we are really coming to look at. It is perhaps the most 'closest to reality part of the image',. The white snowy mountain had a lot of directional hard light on it and the shadows are sharply defined here. If the image had been made on a soft-light day, even by adding a lot of contrast the shadows would have still been very diffused. So I think it's fair to say it was a high-contrast day, and Ansel has let the mountains be what it is: a high contrast subject.

With regards to the dark curvy hill, my guess is that it is impossible to put in a sudden separation in tone if there was none in the negative. So I would assume that the hill was dark, or underexposed, but by burning further in, Ansel has allowed the dark nature of the hill to become more prominent.

Green area

The contrasts in this part of the frame need to be kept under control so that the eye goes straight to the mountains and secondly to the horse. So Ansel has had to finely balance the ground so that it's not too dark or or light: not too dominant in either way: it needs to be wallpaper to a degree so the eye can scan over it and not get stuck in there.

Red Area

This is the 'easter egg' of the picture. It's the 'surprise element' that you only see after you have been drawn to the mountains upon first viewing. 

For this part of the print, Ansel has chosen to dodge the surrounding area around the horse, to give the illusion that the sun is highlighting the are where the horse is. To do this he has deliberately avoided exposing the paper at this region to lighten up the forest, but he has also had to make sure that the horse stays very dark even though he is dodging. I think he would have altered contrasts here to accomplish that.


In summary

This image is really about two subjects. The primary one is the mountain range of extreme highlights and dark tones contrasting with each other. The secondary subject is the horse. It's what you see after you eye has moved away from the mountain range.

To accomplish this, Ansel has darkened down a good proportion of the image and left two subjects to be as bright as naturally possible: the white mountains and the area around the horse. He has masterfully orchestrated our eye to initially be attracted to the brightness and contrasts of the white mountain and dark hill, and then to move straight to the horse in the lower part of the frame. Everything else has either been darkened or had contrast removed so the viewers eye does not get pulled away from the main areas of interest in the picture.

It is a masterpiece of editing skill and it always amazes me when I look at it.

Editing is indeed a skill. It is a life-long endeavour to search for the underlying meaning in our work and to bring it out. Sometimes to emphasise certain areas of the picture, we need to reduce surrounding areas by a large degree to let the areas we are interested in stand out. This image is a great example of that.


Re-imagining your exposures

This article relates to RAW conversion, and also film scanning. Although I may refer to film scanning most of the time, you should take into consideration that this applies to RAW conversion also. It’s just that I’m a film shooter, but the concepts still apply if you are a digital shooter.

RAW conversion is important because it is the foundation which all your subsequent edits are built upon. If you start with an image that has too much contrast in it, then you’ll be fighting a losing battle in trying to make some parts of the scene calmer later on in the edit.

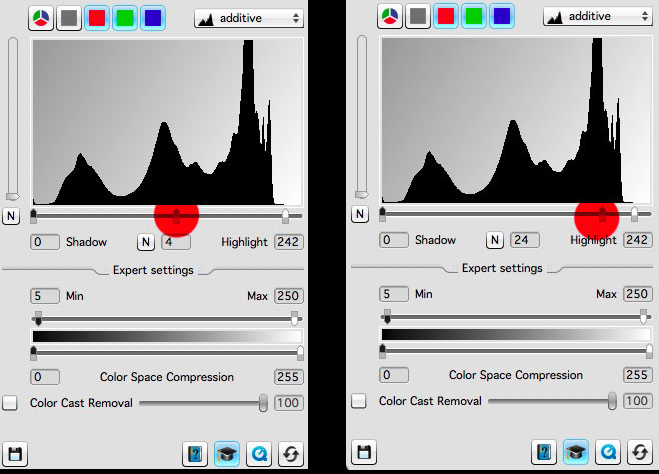
In my scanner software, I’ve chosen to move the mid tone slider to the far right. I get much brighter, and softer scans from this. It’s a really great setting for snow or bright scenes and it keeps the tonal graduations smooth and soft.Setting expos…

In my scanner software, I’ve chosen to move the mid tone slider to the far right. I get much brighter, and softer scans from this. It’s a really great setting for snow or bright scenes and it keeps the tonal graduations smooth and soft.

Setting exposure in a film scanner is an art. You need to learn to use the exposure control to give you the file you want.

My theory and working practice is to try to keep the RAW file as soft and flat as possible. If you start with a soft file, you can always add contrast to local areas of the scene later on. But it’s often impossible to do it the other way round. Start with a contrasty file and try to reduce the contrast in certain areas often has unbelievable and displeasing results.

If I were a digital shooter I would use the black and white sliders sparingly. I would also adopt a view that RAW conversion is not about “pumping up the file to get an all-in-one punchy look”. That’s a dangerous road to go down, and unfortunately, it’s the road that many take.

“RAW conversion should be about setting a minimal baseline from which to work with. But it should be also just as importantly about maintaining the smoothest, softest tones you can keep in your file. By cranking up the blacks and whites in the conversion or applying some camera profile such as ‘vivid’ or ‘landscape you are just going to make the tones within the image much more contrasty and 'hard' looking. All those beautiful soft tones will be obliterated in a couple of clicks.

The same is true for film scanning. When I scan, I never use the auto-exposure feature because it’s assumption is that the file will look much better if the blacks and whites are clipped by a percentage and the tonal range is compressed to look punchy. I’m sure the assumption by ‘Auto-Exposure’ is to try to get the file looking strong as soon as possible. But it’s a clumsy way to work.

Once it’s baked in, it’s baked in. Working with a badly exposed film scan won’t get me anywhere.

“I am often trying to keep the contrasts low and sometimes the mid point of the levels command is pushed to the far right to brighten up the exposure while maintaining low contrast.

In summary, going for the “let’s get the image looking close to where we want” approach at the beginning of RAW conversion is , in my view, bad practice. There is nowhere to go after you do this. The cake is baked before you got the chance to do anything with it.

“Your approach should be for local contrast adjustment. By applying contrast selectively to areas of the image you maintain smooth tones while introducing the perception of punch in the image.

You need to have latitude in your file to leave areas of it soft and be able to punch up the contrast where you feel it’s needed. Applying global contrast in one swoop may feel like you’ve got to where you need to go, but you do so at the cost of sabotaging areas of the picture that need a more delicate approach.

It’s just plain clumsy, a bit like the spray-and-pray attitude of firing the shutter and hoping that one image will be a good keeper. Image editing is a skill. It’s an art. It’s just as important as image composition out in the field, and an area that with the wrong approach can kill fine images.

Cameras and Colourspace Confusion

A lot of photographers think that the colour space option of ‘sRGB’ or ‘Adobe RGB’ on the back of their camera is used to set the colourspace of their camera.

It doesn’t do that.

The colourspace settings are only for the jpegs that are produced in-camera.

RAW-Conversion.jpg

RAW data is unaffected. Indeed, RAW can’t be modified. Think of RAW as a 'negative’ that comes out of an old film camera. The negative can never be changed once created.

So the ‘Adobe RGB and sRGB’ settings on the back of your camera are just for any jpegs that the camera ‘generates’ from the RAW capture .

If you are shooting RAW all the time, then you don’t need to worry about colourspaces while shooting.

Q. So when is the colourspace important then?

A. When you open your RAW files

When you open (or import), you are translating, converting the content of your RAW file into the host software’s format. In Photoshop’s case, you always go through the Adobe Camera Raw software before the image is available in Photoshop. It has to go through this translation stage.

The Raw Converter is where you can set the colourspace and it’s really important to pick a colourspace large enough to contain all the data that your RAW file has.

Effectively speaking, RAW files have no colourspace that you know of. Well, it’s a bit more complicated than that, but when you open up in Photoshop, you have to go through the Adobe Raw Converter. This is where you choose the colourspace and the RA…

Effectively speaking, RAW files have no colourspace that you know of. Well, it’s a bit more complicated than that, but when you open up in Photoshop, you have to go through the Adobe Raw Converter. This is where you choose the colourspace and the RAW file is translated to that colourspace.

Pro Photo is the colourspace to choose, because it is a large enough container - much larger than Adobe RGB, and most likely much larger than any colours your camera can record.

A not too accurate illustration to show that Pro Photo is a larger colourspace than Adobe RGB. You should open your RAW files in Pro Photo.

A not too accurate illustration to show that Pro Photo is a larger colourspace than Adobe RGB. You should open your RAW files in Pro Photo.

If you choose Adobe RGB you may be clipping (throwing away) some of the colours that your camera can reproduce, because your camera may be capable of recording colours outside of the Adobe RGB colourspace.

The best option is to open up your camera files in Pro Photo. It’s a larger colour space and won’t clip the data. You’ll keep all of the colours in your file.

Q. But doesn’t the RAW format have it’s own colourspace?

A. Technically speaking there is a lot of splitting hairs about this. Some say no, some say yes.

The camera has its own proprietary way of recording the data, and this ‘specification’ is given to the developers who write the RAW converter engine. It’s up to them how they translate the information and this is why RAW converters vary (please note this is a serious oversimplification here).

Q. Why keep all the colours if your monitor or printer uses a smaller colour space?

A. Because the more data you have while editing, the better

Your camera is a glorified computer that just stores numbers. Photoshop just reads numbers, and when you alter a photograph you are truncating those numbers. It follows then, that the more data you have, the less chance you have in introducing weird problems into the file when you edit or adjust it in any way.

Although you cannot see all the colours present in Pro Photo because your monitor maybe has a smaller effective gamut, you still get the benefit of having more data to play with while editing.

In summary

  • The colourspace settings on the back of your camera are just for the jpegs it ‘generates’ from the RAW files.

  • The RAW files are unaffected and can’t be changed.

  • When you import a RAW file into a photo editing program, it has to get ‘converted’ or translated. This is when you need to choose a colourspace

  • Choose a large colourspace otherwise you may truncate colour data

Don't automate it

Pre-amble: Everything I write on my blog is just my point of view. That's all it is. I don't for one minute assume that I am right all the time, and any views I express here are simply my own. I write them here with the hope of maybe helping you with your craft and you should take what I say as just that - a point of view.

A few weeks ago, I published a new e-book. It's topic was Photoshop curves and how to really get to know them, as the curves tool is very powerful in helping you transpose or adjust tones in a picture. I personally think there is no better tool out there for helping me get what I want in my photographs.

Hokkaido-2018-(19).jpg

I'm not a big fan of automated tools and I tend to keep this side of my photo editing to a minimum. I do for instance use the Pixelgenius Sharpener tool kit, because I am convinced that it has better judgement with regards to the degree of sharpening that is required. Many photographers tend to either over-sharpen their work. This tool avoids that.

In general though : I avoid automated tools that take the control or 'awareness' out of my own hands. By being involved in the creation or construction of your images at each stage, you gain a better understanding of what is going on.

Photography is your personal way of expressing how you see the world. To keep it personal, you need to be intimately involved in all aspects of the image creation from capture to print. Using automated tasks at an early stage in your own development may feel as though they are giving you a boost, but there are never any shortcuts: you gain in apparent immediate improvements, but rarely do you find your own self development has moved on or learned anything in the process.

Luminosity Masks - the TK Toolkit

I played around with this toolkit, and although I think it's a great thing - it's only a great thing in the right hands. If you are still learning about how to adjust tones in a picture and specifically where you want to adjust them, then I would be very careful in adopting automated toolkits for this. My reasons are that I think the only way to really learn about tones is to adjust things manually. The Luminosity Masks tool kit might give you immediate results but that always makes me highly suspicious that I'm leaning towards convenience over skill. I don't mind using these kinds of tools later on once I've built up the experience and knowledge in my craft as to 'what I want to do'.

An analogy with Zooms vs Primes

This is perhaps a similar approach to using Zooms as a beginner. Zooms are great once you have built up a lot of experience of working with different focal lengths etc, but for most beginners, the convenience of a zoom means they are less likely to learn. Sure - zooms  'appear' to be the most obvious choice: why buy several lenses when you can have many lenses rolled into one? Well, my feeling is that when you use a zoom, you learn very little about the properties of the focal lengths you are working with. If, on the other hand, I give you a few primes to work with, you soon learn how they 'look' when you put them on the camera. If I give you a 24mm and 50mm lens only, you will soon learn to 'see' how they work and you can even visualise the scene in your mind in both focal lengths before putting them on. You also learn how their background / foregrounds are compressed, and you also learn what amount of depth of field each lens has. This is because most of the properties are fixed. With zooms, everything is variable. Much harder to remember what is going on.

Also, and perhaps most importantly, zooms make beginners lazy. We are more inclined to stay in one spot and force the landscape to fit to us (by zooming). If on the other hand, you use a prime, then the only way to get the landscape to fit correctly is to move. Moving allows you to find out more about the terrain you are on, and I've often found many great compositions as a result. Primes force you to fit to the landscape.

I think this is similar to using toolkits. On the surface, they give you a lot of flexibility but while doing so, they take the control out of your hands, and you don't learn. 

When I edit my photographs manually: I build up an intimate knowledge of how that photograph is constructed, how each object and tone in the picture interact with each other. I'm very doubtful this happens when I use automated tools, and I'm more likely to overlook aspects of the photograph.

So to recap: automated tools are ok, but I would avoid using them at the beginning of your photographic career. Build up your experiences first by constructing your edits manually. Then maybe years down the line, you can invest in certain plug-in's etc, but only after you've done the work. 

Summary

I know there are a lot of really cool things out there, and they all look like they give you great results, but I think that if you really want to learn, and become more informed about what you do : you have to do the work, and you have to do it manually from the beginning. It is only once you have done the work, spent the years learning to 'see' what in in your photographs and which areas need work, that you should allow yourself to use automated tools.

There are no easy short cuts in Photography. Convenience is rarely a word that is used by me in my craft as I know that to create great work, I have to put the effort in.

Restraint for certain global edits

As a beginner to editing my work, I would often apply broad sweeping global edits. Partly it was because I thought that this was the right thing to do. Partly it was because I didn't know any better. Mostly though: if someone had suggested I edit individual local areas of the picture, I wouldn't have known which areas to change or why I would want to change them.

Global edits may feel like the quickest and most obvious way to adjust an image; you get maximum effect for little effort. Want the image to be more punchy? - then just increase contrast across the entire scene and it will definitely feel more exciting to the eye. That's certainly how I felt about global edits when I started out editing my work.

Global contrast applied: Everything is 'hard-toned', and my eye is jumping from the black volcano to the sand in the foreground and then to the hill on the far right-hand-side. My eye is being pulled everywhere.

Image was left 'soft' and I applied careful local contrasts to the Volcano only.  This gives the  'impression' that there is contrast in the image, while maintaining softer tones in the frame. Thus resulting in a more 'calm' and less fatiguing image to look at.

However, In my experience, at the initial stages of an editing session, I have rarely found a global edit to be the correct thing to do: often the amount of change that I wish to impart on one area of a scene rarely works with other areas of the scene, unless of course, all the relationships and their proportions to each other are in place. This is rarely the case: often an image starts off with some areas requiring more work than others, or some areas requiring to be quietened down while other areas need to be made louder.

By adding contrast and saturation at the very beginning of your editing session, you can lead your image down the wrong road. Lightroom's ordered panels that suggest a workflow encourage 'baking in' global edits at the very start of your editing ses…

By adding contrast and saturation at the very beginning of your editing session, you can lead your image down the wrong road. Lightroom's ordered panels that suggest a workflow encourage 'baking in' global edits at the very start of your editing session. Something I wouldn't recommend, unless you know you need to brighten / darken an image. But trying to achieve 'final contrasts and luminance here' is a bad approach.

The other thing that I don't like about global edits, is that I may (and often am) affecting areas of the image that I don't understand quite yet, or haven't looked at in greater detail / understanding. I am essentially blind to these areas because when I apply a global edit, I often only notice the areas that I'm interested in changing, and don't notice the areas that I don't want to affect.  Rarely do I understand until much later that my global edit has had a negative impact on some area of the picture I wasn't aware of.

Some things can't be undone

There is in my opinion, a lot of bad advice out there. The Lightroom recommended process of walking down the right-hand-side panel in order is, to my mind, prone to error. By trying to achieve final contrasts and luminance here at the very beginning of your editing session encourages baking in tonal adjustments to areas of the picture that may not require them, and will be difficult later to undo them.

Often when contrast is added, it is often difficult (read impossible) to undo it on further adjustments. This is similar to shooting in hard light: you can't take away shadows and contrasts if they were in the original scene, no matter how much contrast reduction you wish to add, but if you start off shooting in soft light, you have the luxury of adding contrast in to suit, and you can do it to varying amounts throughout the frame also. 

With this in mind, if we go back to thinking about our RAW editor settings, it makes sense to leave the blacks and whites and contrast at default settings, so that if there are any smooth tonal graduations in the frame : they remain intact.

More contrast means less smooth tonal graduations

This is really the key to this post today: adding contrast as a global edit at the very beginning of image editing will reduce smooth tonal graduations in the frame. You make the image tonally 'hard' and the eye is pulled all over the place - everything will be shouting for the viewers attention.

Conversely, if you take my advice, and deliberately leave your RAW settings so the image is quite soft and flat, you can add in the contrasts and punch to local areas of the frame that need it, while maintaining many of the smooth gradual tonal shifts. The final result will be more restful to the viewer's eye and will also reduce the chance of viewer fatigue.

Global edits are worthwhile

Having said all this, it is worth pointing out that global edits do have their place. For me, they are used to 'equalise' the picture once all my local adjustments have been made. Once I feel that all the adjustments are now in place, but the entire image needs to be either brightened, or darkened, or perhaps some colour cast needs to be removed, this is when I will work with global edits.

So for me, if I were to sum it up:

Local edits are for 'interpretive, creative  intentions'.
Global edits are for 'equalising' or 'finishing' a picture.


The creative edit

Today's post is all about the creative edit. I'm been very kindly given permission to use one of the images that was discussed and edited during my Digital Darkroom workshop this past May. Many thanks to Orchid for allowing me to share this image with you.

Disko Bay, GreenlandImage © Orchid Fung, workshop participant, Digital Darkroom class May 2018

Disko Bay, Greenland
Image © Orchid Fung, workshop participant, Digital Darkroom class May 2018

There is often an image hiding within an image, and often a re-interpretation hiding within an interpretation. When we first compose a scene out in the field we often look at it from the point of what was there, often focussing, composing, setting up with the intention that we are going to record faithfully what we see. But when we come to edit or to review the image later, we often re-interpret the original composition and see other crops or other compositions within the original frame. This I believe is perfectly normal and should be encouraged.

I think if you are a photographer, you are always 'seeing', but also, you should always be interpreting, and that means even re-interpreting. To look at a photograph and see something else within it, is a similar process, if not identical to the one that allows us to look at the original world view and choose how to interpret it with our initial capture.

If you get good at choosing what to put into the frame and what to leave out , then I see no reason why this should not continue when you come round to reviewing your work and then deciding to re-crop or make another photo out of an existing one.

Which is what we did here with this photograph.

The original capture (RAW file with no processing applied) it shown below. My intentions are to illustrate that sometimes there are strong shapes and motifs in a photograph that will get stronger if we manage to remove the other things that are competing for our attention, and also, that it is perfectly ok to depart fully from what was captured.

The original raw file

The original raw file

During my workshop, we discussed how as visitors to a location, we are often caught up in the experience of being there. We live in a 3D world with real objects and we often tend to separate them in our mind because we know they are physically different things. I also believe that we look at tones in different ways when we look at scenery compared to how we look at tones when we look at a photograph. I am convinced that my dear friend Orchid thought the highlighted snow in the foreground was a pleasing part of the photograph because I too, have done the same. I have also taken many many photographs where I was inclined to put a foreground into the picture when non was required. This is, I believe, because as physical beings we wish to represent what was immediately in front of us. Foregrounds are a way of allowing us to step into the picture after all.


It is only when we review the image later that we find that perhaps the foreground is too distracting, or maybe it doesn't have enough aesthetic beauty to support the rest of the frame. Which is what we discussed with this photograph. I know the photograph was taken because of the mountain peak in the background and I believe the foreground was put in there because of such a need to have something to help us walk into the frame.

For me, I'm fascinated by the disconnect between a photograph and reality. I do believe that we see differently while on location than we do when we are reviewing photographs. For many of us the process is different, yet I have a very strong feeling that it shouldn't be. We need to be able to 'see photographs' while on location. Not scenery, and this is the hardest thing to do for most of us because we've had a lifetime of thinking and seeing the world as a living breathing 3D reality.

So what of the final edit? Are you shocked at all by how different it is from the initial capture? I'm curious because for me, I think of photography is the art of creating an illusion. Photographs aren't real, even when we don't alter them, they still do not convey what we saw or how things actually were. We could get quite philosophical if we chose to on this one.... but for me, photography is a creative-arts endeavour where our aim is to create a beautiful illusion. How we get there is a matter of personal ideals of what photography is and what it isn't. I have my own thoughts on what is photography (dodging, burning, cropping) and what isn't (blending, HDR, merging, superimposing things) but that is just for me. I realise that each and every one of us has our own boundaries of what is and what isn't photography and I respect that you may be happy to merge or superimpose things - there are after all no rules, and nor should there be. It's an arts endeavour we're discussing here.

I think my interpretation I made of Orchid's photo takes the viewer to the heart of the picture - that beautiful peak at the back of the original frame. By softening the tones down dramatically across the picture, we have removed a lot of textural details that would be vying for our attention. Doing so enables that beautiful graphic zig-zag shape to emerge in the photograph a perhaps the reason for the photograph. It was there all along, but it was competing with so many other elements that it was being drowned a little.

I think editing is an enormously creative process. It is a space that I can spend hours and days in, and it has taught me never to judge my work at the point of capture. I never really know just what the final images may end up being like, and I've certainly had images that have become personal favourites when I almost never worked on them because I wasn't convinced they had enough merit.

Photography is the art of looking again. And again. Of being open, and willing to re-interpret something another way. I hope today with this example I've shown you exactly that.

Many thanks to Orchid Fung for allowing me to reproduce and discuss her beautiful image.

Let the work dictate its tonal signature

There is a reason why the word 'tone' is used in the world of photography, as well as in the world of music. The photographic-tone has the same function as that of its musical counterpart. In both mediums of music and photography a tones operate the same way: it can exist in its own space, allowing us to perceive it as separate from other tones, or it can be deliberately clustered together with other tones, in the case of music, one sound, or in the case of photography one continuous area of varying tone.

The darkest tones in this image are mid-tones. I find it interesting that the darker tones - in this case - the mid-grey lines in the image appear much darker than they are because the adjacent tones are much brighter.I've become more considerate ab…

The darkest tones in this image are mid-tones. I find it interesting that the darker tones - in this case - the mid-grey lines in the image appear much darker than they are because the adjacent tones are much brighter.

I've become more considerate about the range of tones I wish to use on an image by image basis. Not every image requires the same tonal signature and it is a skill as a photographer to find out what signature each photograph needs.

In music, when we have tones that compliment each other, they sound pleasing or 'harmonious' and we tend to associate them with feelings of calm. Conversely, when we have several tones that seem to be at odds with each other they can be dis-pleasing or 'dis-harmonious' and this may create tension in the music. The same is true with photographs: tones that work well together are considered harmonious and tend to convey a sense of peace, while tones that don't work well together are dis-harmonious and tend to create tension in the picture.

This in no way to suggests that 'dis-harmonious' tones in a photograph are a bad thing: I often think that good photographs intentionally use degrees of both 'harmonious' and 'dis-harmonious' tones. But the use of them is done in such a way that it works and by doing so, we create contrasts not just in terms of differences between light and dark, but also in terms of areas of the image being at rest with other areas containing tension.

I think it may be easy to make a broad assumption that we should all be aiming to create images that contain harmonious tones only, but the use of tension in a photograph cannot be understated. It is just another way to create contrast when done well.

The problem in all of this, is being able to introduce tension when it's needed, and not as a result of a lack of expertise, or an untrained eye. Many beginners images will often contain areas where the tones do not work and may have unwanted or unintended tension. Applying careful amounts of tension in a photograph I believe, is a skill that only comes after some time. To impart disharmony into a photograph without it being judged as a poor edit or poor compositional choice is a hard one to pull off: there is a great difference between work that contains dis-harmony when it is unintentional, and work that contains dis-harmony as an intention.

I often see a correlation between the musical octaves of a keyboard and the tones of a photograph.

I often see a correlation between the musical octaves of a keyboard and the tones of a photograph.

Most beginners work suffers from a lack of application of tone. Tonal relationships are often not at the forefront of their compositions or edits. Tones tend to be muddled and confused or less thought out, because the photographer is still working on composition, and for most of us that means 'placement of objects within the frame'. Only composition is much more than that: it is not only the placement of objects within the frame, but also the application of tone and colour. In my own case, I think the use of tone and colour has been something that has become more apparent to me in the last few years of my photography. And that's after almost 20 years of editing and composition. For along while I only saw the objects within the frame and colour and tone were often a welcome but often unconsidered addition to my photographs.

And this is where today's post begins: I've come to realise that each photographer has a tonal-range signature. In other words, we have a tendency to live within a certain range of tones and most of our work is often edited or selected to work within that range.

You may find that one person's work is consistently dark, while another's work always uses the entire range from absolute black to absolute white. Another photographer may always create hi-key soft images: we all have our own pre-disposition towards a certain tonal response in our work. It's based on our own aesthetics: we gravitate to doing what we like, or what we feel most comfortable with.

But we often do it based on what we like, and seldom whether it's what the image is asking for. Applying the same range of tones to all of our images does not work. The same way that applying the same techniques to different subject matter will not always succeed: not every photograph requires the same treatment, and it is a skill for us to 'see' or recognise the tonal range that the body of work is asking to be worked within.

Lencois-Maranhenses-2018-(15).jpg

Each portfolio, or collection of work has its own tonal signature. That tonal signature should not be defined by the photographer, but instead the images should tell you what they need. Each landscape we visit often tells us what tones to use, and our edited work should reflect that, or at the very least be sensitive to it.

Much like certain songs live within certain octaves, so too do photographs tend to require to live within certain tonal ranges. Some may require a deft approach to high key tones, while others may require to use the full tonal range available. The key is in knowing what each image needs, rather than what we wish to force upon them.

We need to step away from our habits. If you are always creating dark images, then you are missing out on the upper tonal ranges that may offer some of your work a new avenue. If you are always creating bright work, then you are also missing out on the depth of what darker tones may do for some of your images. And if you are often creating work that use the full tonal range, as I think many of us do, then you should reconsider that sometimes using narrower tonal ranges can have great benefits and suit the work better.

As I said at the start of this article: we all tend to fall into using certain tonal registers or ranges in our work. We have our habits. Rather than forcing the same usual techniques and tonal habits on your new work, I would suggest you ask it what it needs. Let the work tell you. Often the work has a way of letting you know what it needs, and it's just up to you to develop the skills to listen.

Why you shouldn't set Levels

If you want your files to look like medium format images, then you should try to stay away from the Levels command. Regardless of what tutorials you see out there that say 'set the levels'.

Here is why:

  • The Level's command makes the tonal transitions more sudden, and therefore harder.
  • Tones that had soft graduations become harder as you move the left and right level adjusters towards the middle.
  • You are in effect adding contrast to the image, and that by definition means the tonal responses in your file become more sudden, and therefore harder.
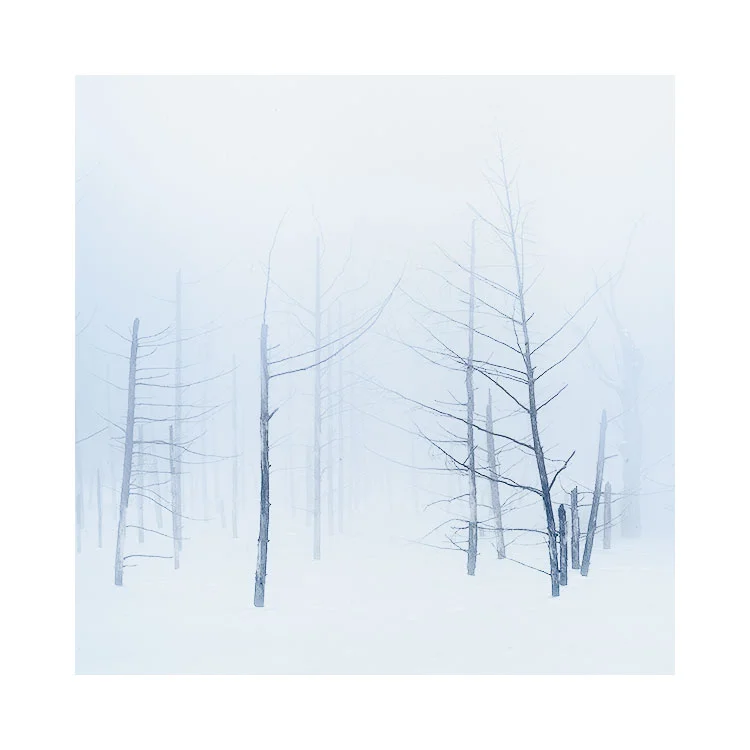
Blue Pond Shirogane, 1.jpg

I only use the Levels command occasionally and never at the beginning of an editing session. It is a blunt tool which applies itself globally, and although is useful for fine-tuning a completed picture where the tonal relationships need to remain intact, is a recipe for disaster if it's used at the beginning of the session.

Indeed, global edits should be shied away from until the very end of your editing sessions, because global edits are lazy edits. I have rarely ever found an image that I can adjust the entire picture with one edit and if I've believed so, it is usually due to an oversight about what is really going on in the picture.

Photographs need to be approached sensitively. You need to work on each individual area that you wish to either bring forward or suppress. Attempting to do this with one global edit won't give you the best results and you'll only nail things down that shouldn't be touched.

If the edit session is just starting out, you need to keep the file as soft as possible, and only introduce depth or contrast in local areas. It is this 'contrast' between soft areas and hard areas, or unedited and edited areas that will give your images the contrasts you seek, whilst retaining smooth tones.

But! you say; 'I wish to make the image more punchy, and make sure I'm using the full tonal range of tones from absolute black to white in my prints. Shouldn't I use the level's for this?'

No. Not every scene you work on requires the full-tonal range approach. Some images may have softer qualities, and don't use the full tonal range available. Consider the images in this post today. If you open them in Photoshop and go around with the Curve Hand-tool and inspect the tones, you won't find any absolute blacks in these. They don't need them, and to have make them more punchy would have killed the tonal response that was present in the scene.

Blue Pond Shirogane, 3.jpg

Globally adding contrast to a picture is to apply the same brush to everything. It's a very blunt way of trying to bring presence to a photograph. It also means you aren't reading the contents of your images or that you understand what is going on in them.

Selectively choose the areas you wish to emphasise, and leave the others alone. Good images have quiet areas as well as loud areas, whereas badly edited images often suffer from everything vying for your attention.

If you wish your images to have more punch to them, the best way to do that is to keep some areas of it soft, so that the more harder areas have something to contrast against. That means using local edits, and it also means individually adding or reducing presence selectively. If you do this correctly, you'll find that your images retain their smooth tonal responses while also having presence. But by starting off by setting the Levels in your picture and therefore making all the tones in the picture harder, you leave yourself no room to manoeuvre and there is no room for your editing session to grow.

Vanishing Point II

It's often been said that the eye is attracted to the brightest part of the frame. And I have added to this by saying that I think the eye is attracted to the tone that is less like the rest of the picture. So in a bright image, your eye is attracted to the darker tones, and in a dark image your eye is attracted to the brighter tones.

In my image below, I find my eye is pulled right towards the middle of the frame to the darker tones of the curve of the foreground slope and also the thin dark line of the hill.

Fjallabak-Winter-2018.jpg

I've deliberately brightened the edges of the picture: it is in effect an inverse vignette. Can you see it now that I've mentioned it?

As with all good edits, they should touch you in some way without you being consciously aware that anything has been done. You should instantly buy the illusion that is being cast upon you.

1.jpg

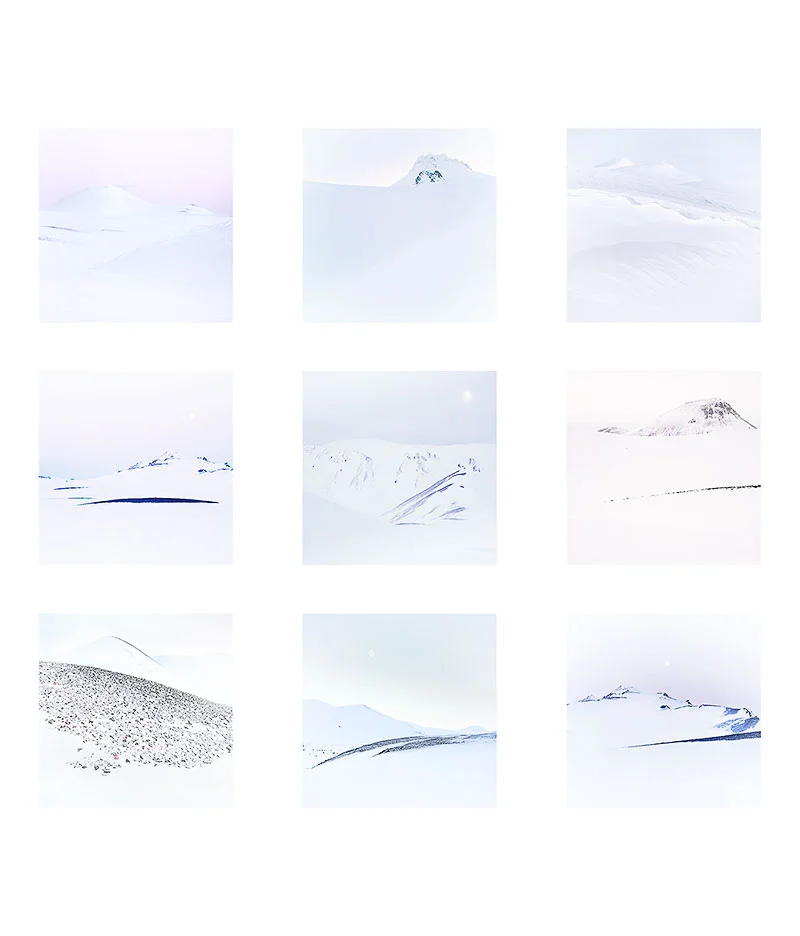
One final note today: I felt there was a danger that everyone would think that these images had no colour in them, that they are just black and white. I've found that some of us are very aware of colour casts and can spot when white snow is really blue-white, or magenta-white, or grey-white. I've chosen to show you the work here now with a white background, as I think it allows you to notice the colours in the pictures more. You should perhaps ask yourself what colour is the snow in each of these images, or in particular, what tint does the whites in each picture have?

2.jpg

Good Printing means good Editing

Four years ago when I first introduced my Digital Darkroom workshop, it was the least popular thing I offered in my list of workshops. I was personally surprised by this, as I had thought that this kind of workshop would be something a lot of people would be looking for. I was wrong.

It has taken this number of years to establish the course, and now it fills up very quickly each year. I'm glad that photographers have come to realise that editing is a skill that requires as much thought and deliberation as our fieldwork.

"Good edits come from improved visual awareness"


Editing isn't about just making the image a little more punchy, neither is it about applying templates to your work to make them look better, and it certainly isn't about trying to fix a bad image. Editing is about working with the tones within the picture, so you can navigate the viewer's eye around the aspects you want them to look at, and to take their eye away from the areas you wish to place in the background.

fine-art-printing.jpg

Right now, we are living in a period where the emphasis is on shooting. Editing is almost an afterthought. Something that is done afterwards. For some it is an attempt to 'try to make the picture look good', and for the few who have figured it out - they have come to realise that editing is related to what they noticed in the field. Indeed, I often choose locations to make a picture due to their tonal properties - I know they will work well in the edit stage because they have enough tonal separation to work with.

I do not treat the editing stage lightly. I have found it is perhaps the biggest contributor to my 'style'. It is a highly creative space to work in and I will spend hours, if not days and weeks working on a portfolio of new images.

I'd also add;

"Good prints are made from good edits.
And good edits can only be verified by reviewing prints"


This is most certainly true. You can't make a good print from a badly edited image, and likewise, you can't make a good edit without printing it to evaluate it. Let me explain.

When I came to preparing my Colourchrome book for publication last year, I printed every single one of the 40 images. I had to do this because it's the only way to confirm to myself that I've got my edits right.
 

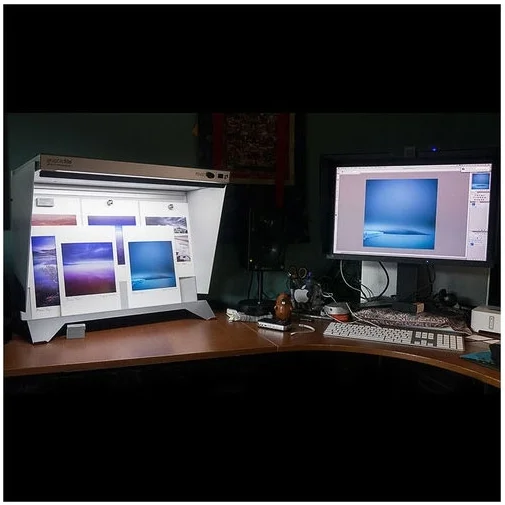
"A calibrated and profiled monitor will only get you so far.
I've been fooled many times by seeing colour casts and other problems in the final print that weren't initially obvious on the monitor.
I would go back to see if they were visible on the monitor only to find out they were. I now print to verify that what I'm seeing is true. It's the only way"


Even though my monitor is calibrated and profiled to give me the most accurate representation of what's in my files, I still find discrepancies once I print them. This is because the eye is highly adaptable and once we've seen the image on the monitor for a while, we adapt to the monitor's colour and tonal response. For me, I've found that after a while I can't see colour casts. I need to print the work to verify it.

When I find discrepancies in the print, I go back to the monitor to check if those discrepancies are visible there also. They always are. Yet I had not seen them, because my eye had 'adapted' to the monitor the more I looked at it and I've come to realise that there is yet another skill required to 'interpret' what my monitor shows me.

Until I master being able to 'read' my monitor, the only way to 'see' the picture, is to print it out.
 

"We all should print.
It forces us to look again"


Prints also force us to take note of the luminosity of the tones in the print. It's only when I print that I notice that I'm not taking advantage of the tonal range available to me. You can of course use the hand widget in the Curves tool to interrogate tones to find out where they reside in the tonal scale. Or even use the LAB mode's Luminosity value in the info palette to show you where the tones really reside, but you still need to print the image out.
 

"Where I once thought something was bright and stood out,
I
'm sometimes confronted with a lacklustre tonal range in print.
The print tells me I haven't gone far enough"


It's really a case of learning to interpret what your monitor is telling you. It's very hard to do because our eye adapts to what the monitor shows us and we become blind to what is actually there. 
 

"If you aren't printing: then you aren't getting the most out of your edits.
And ultimately, the images aren't optimised"


So you need to print. All photographers should print because it is a vital step in pushing your images to the best they can be.

Printing is also a step in learning to 'see' better, because we are forced to look again, to re-interpret the print and notice how it differs from what we thought you were seeing on our monitor.

My advice is - print, and incorporate it as part of your editing workflow. Printing helps inform your edits and show where you need to tighten up on tones that aren't as bold as you thought they were.

"Did I say you need to print? 
...You need to print!"