The making of.....

Everyone sees differently, and if I give you any thoughts today about how I created my images, please bear in mind that there are many ways an image can be constructed. I am not advocating that mine is the only way, or the right way.

You should try to find your own way, and I think the best way to do that, is by listening to what others say - particularly photographers that you like, and figure out what parts of their process resonate with you. If it makes sense : use it. If it doesn’t, then discard it. The key thing is to think for yourself and to decide what works for you.

Hokkaido-2019.jpg

Image prologue

I often find myself responding to the elements. If it looks good: shoot it. Don’t attempt the ‘I’ll come back for that one, as the reason you like it now, is because it’s working now. I’m not one to sit around for hours anticipating a good shot at a particular place. That’s a bit like trying to predict the stock market.

Interestingly, to contradict this, I don’t like chasing photographs either. Come on a workshop with me and you won’t find me chasing the weather forecast. You can often find something where you are right now. I prefer to stay where I am, and I seem to take a perverse delight in not knowing what the forecast is. My reason for this is - I don’t know what I’m going to want to shoot until I see it, and trying to put some kind of formula onto my shooting by watching or expecting certain weather patterns is just pointless in my view.

The adage remains true: if you don’t go, you don’t get. Or f8 and be there.

And I’ve had many workshops where the forecast didn’t look promising (for me - it’s usually a case of it being too sunny) only to find out that we found things to shoot and had a great time. You always find something.

The image

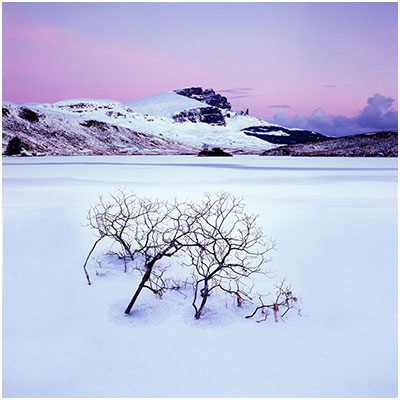
But this photo is a mixture of serendipity and of also waiting. I’ve been to this location many times and I’ve never seen it quite like this. It was snowing very heavily, and there wasn’t a breath of wind. So I knew that any small trees I used would be stationary for long enough. When I did find this composition - a small tree at the verge of the road that I’d never seen before, I knew that it would fit nicely with the background trees when the snow was blowing through. The sun was right in the centre of the frame and it kept popping through the snow clouds a bit too much causing a lot of extreme contrast. So once I settled upon the composition, I had to wait it out for about 10 minutes hoping the cloud front would thicken and obliterate the sun enough so I could record it on film without over exposure.

Learning to anticipate what the weather is going to do in the next few minutes is a good thing, but I often give myself a ‘time-out’ period and if I’ve been waiting far too long, I tend to abandon the shot and go find something that is working. I’m not in the fortune telling business. I’m here to work with what’s working now.

I used a telephoto for this lens. A 150mm lens on my Hasselblad, which relates to around 75mm on full 35mm format. The background trees were far away, so I had to pull them in and isolate them from the other noise outside the frame. But this left the foreground tree too large in the frame. So I had to walk back periodically into the middle of the road to get this shot.

Zooms shouldn’t be thought of as ‘how much you’re getting in, or how much you’re excluding’. They are really powerful at changing the emphasis between background and foreground. My trick is to do this:

  1. Set the focal length to make the background the size I want.

  2. Move forward or backwards to change the foreground to the size I want.

You see, once you set the focal length, no matter how many feet you walk forward or backwards, the background size remains unchanged. So once you set the focal length, your background is now fixed. Which then means you need to move forward or backwards to fit in your foreground. Moving a few feet either way can change the size of your foreground dramatically, while keeping the background the same size.

I’ve mentioned it many times, but for beginners, zooms are counterproductive. You tend to stay rooted in one spot and instead of walking around, tend to zoom in and out to get the foreground AND background to fit the frame. So you have two variables that change at the same time.

It’s much easier to work with one variable as a beginner, than two.

With a fixed focal length you have one variable to work with. Since you can’t change the size of the background, you only have the foreground to change. It makes for simpler composition if you only have one thing changing when you move. And besides, primes force us to move around the landscape - and that’s just great as they force us to discover things we wouldn’t have noticed by standing still.

Please don’t misinterpret what I’m saying. I am not saying that zooms are bad. Zooms are for the experienced shooter. Not the beginner. I just think that as beginners, working with fixed focal lengths is easier to master and as you become more experienced you can migrate up to zooms.

If you already own zooms, I’d suggest you try to prevent yourself from just standing still and zooming in/out to get a good shot. Instead, try to think of your zoom as a collection of fixed focal lengths. Try setting the zoom at 24mm, 50mm and 70mm and when you choose one of these, move around to see how the scene fits into the frame. Try to avoid micro-adjusting the focal length. In other words:

  1. Zoom to fit the background into the frame the size you want it to be.

  2. Move backwards and forwards to introduce / remove foreground elements until you get a good balance between background and foreground.

Back to the image

This image works well because I have the proportions between background trees and foreground tree about right. It also works well because I used the weather conditions to reduce the contrast of the sun to a manageable exposure.

It’s one of my favourites from this year’s Hokkaido trip. I’ve been to this place many times and yet this is the first time I saw this composition, which just goes to prove that nowhere is truly ever ‘done’ and going back and back again is always advantageous.

New e-Books in-Progress

Way back in 2007, after a lot of nudging by a good friend of mine, I ran some of my very first workshops. I chose Torres del Paine national park in Chilean Patagonia of all places to start on my little adventure (a rather grand entrance into the world of photography workshops don't you think?). I knew the park well, had visited it more than a dozen times, and felt it was as good a place as any to commence a possible career in workshops.

Looking back, the workshops were more 'tours' than anything, but they were a great learning experience for me (in fact - all my workshops and tours have been great learning experiences for myself as well as hopefully, my clients too). Seven years on, and I now find myself in a position where I feel the structure and format of my teaching based workshops is very honed now. This I feel, is due to many factors.

Firstly, as a workshop leader, having to teach someone else something, really makes you have to think harder and get a much clearer picture in your head about it. Through trying to explain something to someone, you discover holes in your own understanding. Getting a clearer picture helps not only the participant on my workshops, but it has also helped me a great deal in my own development as a photographer.

Secondly, my own style of photography has morphed and changed over the years. I've found that applying a sense of self-awareness has helped me enormously. I find that I consider and reflect a lot about what it is that I do, and why I do it.It's been greatly beneficial to notice the changes in my style and use any new-found awareness in my critique sessions and time in the field with my clients.

One of the aspects of this, is that I often find that there are topics within photography that I hadn't thought about, or didn't appreciate might need to be taught.

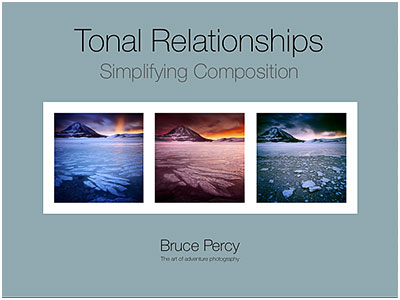
One of them that I feel has been lurking away for a good few years - popping it's head up - trying to get my attention is that of  tonal-relationships. Which is why you see the proposed cover for a new e-Book I'm working on at the head of this post today.

For most, composition is all about where to place objects within the frame, but I think it goes further than that. One aspect of good composition is that of the inter-relationship of tones between objects within the frame. Many of us often think of meaningful things like 'sand' and 'rock', but few of us recognise that sometimes sand and rocks have similar tonal values which means that when they are recorded in 2D, the merge to become one confused object.

But there is more to tonal relationships than this - there is the meaty subject of how to balance an entire composition. If you consider darker tones as 'heavy' tones, and brighter tones as 'lighter', then you can often find some photographs are light-headed, or bottom-heavy, or maybe there are patches of tone around the frame that are too dominant. For instance, brighter tones will stand out if they are the minority in a dark image. Conversely, darker tones may stand out more in a  pre-dominantly bright-toned image.

But tonal relationships don't end there. We have the thorny subject of noticing that a certain tone in the frame may become more or less dominant by adjusting the tone of an adjacent object. This tends to move into the realms of colour theory.

Proposed Focal-Length's e-Book

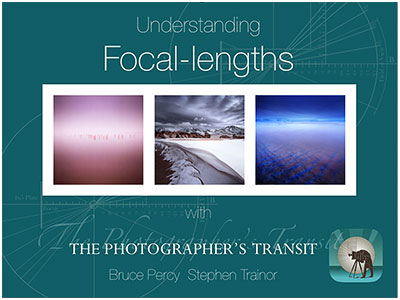
But there's more yet. Over the past few years, I've found myself trying to ween participants away from using zooms in their compositions. It's not that I don't think zooms are good. It's just that until we master a few focal-lengths, zooms tend to complicate things by giving us too much, too soon. In my own view, It has taken me a decade to learn to 'see' in three focal lengths - 24mm, 50mm and 75mm. That is enough for anyone to be getting on with.

So there is work in progress for another e-Book, that I'm writing with Stephen Trainor - author of The Photographer's Ephemeris sunrise/sunset application that many of you know I use. Stephen has developed a really nice new application called Photo Transit that you may wish to look into further.

In this e-Book, Stephen and I will aim to convey how different focal lengths behave, and how to compose with them. Standing at one spot and zooming in and out with your zoom lens is not the way forward to create great compositions. As participants of my workshops will know, I prefer the idea that you should zoom with your feet. Fix a focal length, and hunt the landscape to fit your focal-length, not the other way round. See this post about focal-lengths for further detail.

I'll be busy over the next few months working on these e-Books. But I may share some observations over the next while during my writing phases for them. I hope these titles may spark some interest for you.

Focal lengths are for controlling background to foreground presence

I often feel that many of us are attracted to different focal length lenses simply because of the difference in angle of view they provide.

Wide angle lenses allow us to fit more into the frame, but at the same time, they make everything smaller. Conversely, zooming up the focal lengths, allows us to fit less into the frame, and what is included, tends to be more present.

So changing focal lengths affects two things in one go: angle of view, and subject presence. Only, most of us really only think about angle of view.

In this post, I'd like to discuss how using a fixed focal length and zooming with our feet, can radically change the compositional balance between foreground and background subjects.

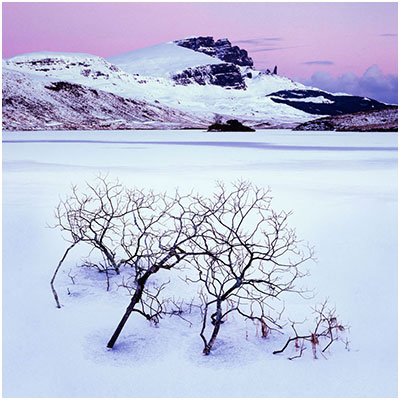
In the above image, this is how I perceived the location in my mind's eye.

I had decided I loved the background mountains so much that I wanted them to have as much presence in the frame as the foreground bush.

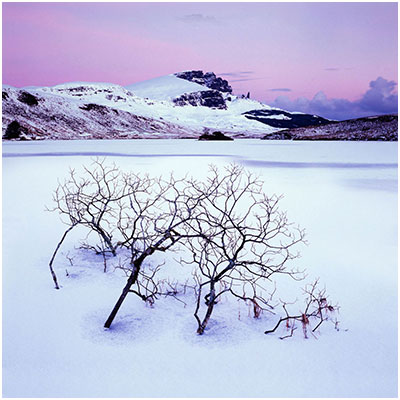
However, as soon as I got close to where the bush was, I ended up with the shot below (note how the background mountain is smaller, and less present in the frame compared to the bush):

What happened was that as soon as I got close to the bush, I realised I needed my trusty wide angle lens (24mm) in order to fit in the bush and also the mountain. I put it on my camera, and all of a sudden everything in the frame got smaller - the mountain and also the bush.

My next step was to walk  closer to the bush to give it more presence. This certainly worked - the bush became pretty dominant in the frame, but the background did not change in presence at all. And this is a key point to think about here:

"When you put on a wide angle lens, everything gets smaller, and if you move closer to your foreground, it changes dramatically while your background remains the same."

My foreground became more dominant, while my background became less dominant.

Here is the same location, shot at 24mm again, but in this instance, I moved  about 3 feet back:

Notice how the background mountains have not changed in size, but that the foreground bush has become less dominant. The key point to this is:

"By keeping a fixed focal length (in this case 24mm), and moving closer to, or further away from the foreground subject, only the foreground subject changes in size and becomes more dominant, or less dominant respectively"

Ok, so you may be asking - well how did Bruce manage to get the first shot then? And the simple answer is that I used the same focal length as my eye - I used the equivalent of a 50mm lens, to ensure my background mountains were the same size as I had originally perceived them. I then walked back until I could fit in the bush. The key point about this is that:

"When you zoom in, everything gets bigger, but you can only influence your immediate foreground. By moving back 10 feet or so, you can radically change your foreground, while keeping the background the same size."

For this very reason, I prefer to set a fixed focal length, and zoom with my feet. It's also the reason why I prefer fixed focal length lenses to zooms (at least until you fully understand the properties of using different focal lengths).

The key points about doing this are:

  1. When moving around a landscape with the same focal length, the background does not change size - even if I move 20 feet back, or 30 feet back, the background remains the same. The foreground however, changes dramatically.
  2. I figure out how big I want my background to be and zoom the lens to fit the background it in the frame.
  3. I then zoom with my feet. By moving nearer towards / further away from my foreground, I am able to get the right amount of proportion of foreground to balance with the background.

Those of you who have attended workshops with me, will know that I spend a lot of time balancing objects within the frame. I often think of proportions and spacial distances between objects and how they relate to each other. For many of us, this is as natural as computing where to put our hand to catch a ball, while for the rest of us, it's something we have to work at very much.

By zooming with a zoom lens on location, you make composition harder - because you move two goal posts at the same time: angle of view, and presence of objects within the frame.

"I find it is rarely a good idea to stand at one spot and zoom, because although I may fit everything I want into the frame, I'm not giving the background and foreground the correct amount of proportion to each other."

By using a fixed focal length, I have decided how big my background is going to be, and I use my feet to change the foreground presence to balance against my background. In the examples above, I chose to make the background mountain a certain size in the frame, and I then moved back and forth with my feet to increase / decrease the size of the foreground bush in relation to the background.

In other words, I spent a bit of time balancing the dominance of foreground subject with background subject.

If you own a zoom lens, then try to avoid zooming in and out to fit a subject into the frame. Instead, determine what size you want your background to be, and then zoom to fit that. Then keep the focal length static and move with your feet to fit in the foreground.

"Focal lengths are really for controlling background to foreground presence."