
The Vestmannaeyjar (westman islands), Iceland. As part of my central highlands of Iceland tour this year, we ended up at the coast on the last day. What felt like a rather incidental shot taken to fill up the time before we headed back to Reykjavik turned into something a little bit more than that. I’ve always wanted to shoot the Vestmannaeyjar, but I didn’t anticipate that it would happen as an add-on to a trip into the interior.

Stephen in the landscape
tonight I’m working on my images for this year’s central highlands Iceland tour. This is the trip where we work with as little as possible. Ultimate minimalism !
Occasionally one of my group members would pop into the frame of my camera. We are all spread out as explorers in this vast canvas of white. My good friend Stephen Naor came over the brow of a hill, and I chose to include him in the photograph. I think it adds some nice scale to show how minimal this landscape can be.

What I love about the central highlands in winter time, is that the wind often blows the snow off the crest of hills leaving them exposed. The black desert below peaks through the snow and provides the illusion of black brush strokes on a white canvas.

The first two images will feature in my finalised portfolio. I include the image below, just to prove to those who know Stephen that it is indeed him :-)

Euclidean geometry, Lençóis Maranhenses, Brazil
I’ve been reviewing my images from Lençóis Maranhenses tonight, as I will be visiting this fabulous place in a few weeks time for my second visit.

Why is it, that most photographers try to shoot the entirety of a lake or lagoon? Rather than using a section of it, which I think provides a more focussed composition, most are tempted to get the wide angle out and shoot its entire circumference. It just smacks of trying too hard to spell a message out that most viewers already understand.
All I’ve learned is that less is often more.
Try to fit an entire lake into the frame and all that happens is the picture become weak as a lack of presence ensues. All because one is trying too hard to convey too much.
Rather than trying to squeeze a whole lake into the frame of your camera, I would suggest you focus on a small region of the lake. Preferably an area that offers some kind of elegant shape to keep the viewer interested.
The viewer will fill in the missing gaps. As is the case with my photograph. For most viewers the lagoon doesn't stop at the edge of the frame: it continues beyond, and the viewer delights in filling in the missing gaps.
The Creative Process
Illusive, all encompassing, being creative is our life’s work.
I’ve been writing about creativity for some time now, and I think it’s time I put together something in a more formal format, something that is convenient to read through.
So I’m busy collating all my favourite blog entires over the past few years.
I’m finding I have been doing a lot of re-writing to give more clarity to some of the entries. It might be the perfectionist in me, but I do find that sometimes when I write on my blog I almost need to write the post twice: the first time to figure out what it is I’m trying to say, and the second time to say it as best as I can :-) So I’m busy re-editing the entries right now. So far the e-Book is up at around 120 pages.
I hope to have it ready by the summer.
Thanks to everyone for buying my Printing masterclass e-book. I was surprisingly inundated with orders for it. I’ve obviously been living under the misconception that few photographers print these days. Printing isn’t a black art, nor should it be difficult to achieve great prints that match your monitor. So I was very pleased to find that the e-book sold very well. Thank you :-)

The making of.....
Everyone sees differently, and if I give you any thoughts today about how I created my images, please bear in mind that there are many ways an image can be constructed. I am not advocating that mine is the only way, or the right way.
You should try to find your own way, and I think the best way to do that, is by listening to what others say - particularly photographers that you like, and figure out what parts of their process resonate with you. If it makes sense : use it. If it doesn’t, then discard it. The key thing is to think for yourself and to decide what works for you.

Image prologue
I often find myself responding to the elements. If it looks good: shoot it. Don’t attempt the ‘I’ll come back for that one, as the reason you like it now, is because it’s working now. I’m not one to sit around for hours anticipating a good shot at a particular place. That’s a bit like trying to predict the stock market.
Interestingly, to contradict this, I don’t like chasing photographs either. Come on a workshop with me and you won’t find me chasing the weather forecast. You can often find something where you are right now. I prefer to stay where I am, and I seem to take a perverse delight in not knowing what the forecast is. My reason for this is - I don’t know what I’m going to want to shoot until I see it, and trying to put some kind of formula onto my shooting by watching or expecting certain weather patterns is just pointless in my view.
The adage remains true: if you don’t go, you don’t get. Or f8 and be there.
And I’ve had many workshops where the forecast didn’t look promising (for me - it’s usually a case of it being too sunny) only to find out that we found things to shoot and had a great time. You always find something.
The image
But this photo is a mixture of serendipity and of also waiting. I’ve been to this location many times and I’ve never seen it quite like this. It was snowing very heavily, and there wasn’t a breath of wind. So I knew that any small trees I used would be stationary for long enough. When I did find this composition - a small tree at the verge of the road that I’d never seen before, I knew that it would fit nicely with the background trees when the snow was blowing through. The sun was right in the centre of the frame and it kept popping through the snow clouds a bit too much causing a lot of extreme contrast. So once I settled upon the composition, I had to wait it out for about 10 minutes hoping the cloud front would thicken and obliterate the sun enough so I could record it on film without over exposure.
Learning to anticipate what the weather is going to do in the next few minutes is a good thing, but I often give myself a ‘time-out’ period and if I’ve been waiting far too long, I tend to abandon the shot and go find something that is working. I’m not in the fortune telling business. I’m here to work with what’s working now.
I used a telephoto for this lens. A 150mm lens on my Hasselblad, which relates to around 75mm on full 35mm format. The background trees were far away, so I had to pull them in and isolate them from the other noise outside the frame. But this left the foreground tree too large in the frame. So I had to walk back periodically into the middle of the road to get this shot.
Zooms shouldn’t be thought of as ‘how much you’re getting in, or how much you’re excluding’. They are really powerful at changing the emphasis between background and foreground. My trick is to do this:
Set the focal length to make the background the size I want.
Move forward or backwards to change the foreground to the size I want.
You see, once you set the focal length, no matter how many feet you walk forward or backwards, the background size remains unchanged. So once you set the focal length, your background is now fixed. Which then means you need to move forward or backwards to fit in your foreground. Moving a few feet either way can change the size of your foreground dramatically, while keeping the background the same size.
I’ve mentioned it many times, but for beginners, zooms are counterproductive. You tend to stay rooted in one spot and instead of walking around, tend to zoom in and out to get the foreground AND background to fit the frame. So you have two variables that change at the same time.
It’s much easier to work with one variable as a beginner, than two.
With a fixed focal length you have one variable to work with. Since you can’t change the size of the background, you only have the foreground to change. It makes for simpler composition if you only have one thing changing when you move. And besides, primes force us to move around the landscape - and that’s just great as they force us to discover things we wouldn’t have noticed by standing still.
Please don’t misinterpret what I’m saying. I am not saying that zooms are bad. Zooms are for the experienced shooter. Not the beginner. I just think that as beginners, working with fixed focal lengths is easier to master and as you become more experienced you can migrate up to zooms.
If you already own zooms, I’d suggest you try to prevent yourself from just standing still and zooming in/out to get a good shot. Instead, try to think of your zoom as a collection of fixed focal lengths. Try setting the zoom at 24mm, 50mm and 70mm and when you choose one of these, move around to see how the scene fits into the frame. Try to avoid micro-adjusting the focal length. In other words:
Zoom to fit the background into the frame the size you want it to be.
Move backwards and forwards to introduce / remove foreground elements until you get a good balance between background and foreground.
Back to the image
This image works well because I have the proportions between background trees and foreground tree about right. It also works well because I used the weather conditions to reduce the contrast of the sun to a manageable exposure.
It’s one of my favourites from this year’s Hokkaido trip. I’ve been to this place many times and yet this is the first time I saw this composition, which just goes to prove that nowhere is truly ever ‘done’ and going back and back again is always advantageous.
Looking for a fresh point of view?
I feel that polarisation seems to be at the heart of many human interactions these days.
I feel that we are split. Find those who agree with us, and try to avoid those who disagree with us. But I think we should do the opposite. To hang around with those who agree with us, is just to live in a feedback loop and we learn nothing new.
Rather than follow the newspapers that reinforce our beliefs, or follow the photographers that tell us what we already believe, we should go out there to find an alternative view. Even one we may disagree with. Because it will challenge us.

If you know yourself enough, you are most probably comfortable hearing another point of view without feeling threatened. To be able to filter between your own beliefs and someone else’s and to find a new position is the kind of openness we all need as artists.
I don’t for one minute expect everyone to agree with my blog writings. My blog is just a point of view. That’s all it is. But is it challenging enough for you?.
Often hearing things we don’t want to hear, can feel unpleasant, or may feel of little benefit at the time. But if you’re as old as I am (52), then you’ve perhaps learned that challenges and trials in life are often times of growth. We don’t see them that way at the moment they happen, but often years later we’re able to look back and say ‘I learned something’.
I really don’t wish to live in a world where things are predictable and stay the same. And I realise I’m entitled to change my mind as time goes on, because I learn. And I change. We all do.
I think comments or views that are considered negative at the time, are views we should sit up and listen to. I don’t mean to suggest they’re always right, but if they challenge our point of view, then it means we have been given a chance to grow. We’re either able to get more clarity on our current position, or to discover that we’ve learned something and our position has changed as a result.
For me, I’d prefer to go and seek someone who tells me something I’ve never heard before. I’d like to believe I’m strong enough to not feel threatened, while at the same time be able to re-consider without being brainwashed - to find my own new position.
Which brings me to my point today:
as much as I believe I am right, there is always room for another way of seeing things.
I’m entitled to change my mind, at any point.
I’m entitled to change my art, at any point.
Everything is up for discussion. Even when the work is complete.
The work is never complete.
The work is never complete. Nothing is ever cast in stone, and nothing is ever black and white. We should seek fluidity in what we do. We should allow things to happen regardless of our views. We need to be open to let creativity flow.
Re-imagining your exposures
This article relates to RAW conversion, and also film scanning. Although I may refer to film scanning most of the time, you should take into consideration that this applies to RAW conversion also. It’s just that I’m a film shooter, but the concepts still apply if you are a digital shooter.
RAW conversion is important because it is the foundation which all your subsequent edits are built upon. If you start with an image that has too much contrast in it, then you’ll be fighting a losing battle in trying to make some parts of the scene calmer later on in the edit.
In my scanner software, I’ve chosen to move the mid tone slider to the far right. I get much brighter, and softer scans from this. It’s a really great setting for snow or bright scenes and it keeps the tonal graduations smooth and soft.
Setting exposure in a film scanner is an art. You need to learn to use the exposure control to give you the file you want.
My theory and working practice is to try to keep the RAW file as soft and flat as possible. If you start with a soft file, you can always add contrast to local areas of the scene later on. But it’s often impossible to do it the other way round. Start with a contrasty file and try to reduce the contrast in certain areas often has unbelievable and displeasing results.
If I were a digital shooter I would use the black and white sliders sparingly. I would also adopt a view that RAW conversion is not about “pumping up the file to get an all-in-one punchy look”. That’s a dangerous road to go down, and unfortunately, it’s the road that many take.
“RAW conversion should be about setting a minimal baseline from which to work with. But it should be also just as importantly about maintaining the smoothest, softest tones you can keep in your file. By cranking up the blacks and whites in the conversion or applying some camera profile such as ‘vivid’ or ‘landscape you are just going to make the tones within the image much more contrasty and 'hard' looking. All those beautiful soft tones will be obliterated in a couple of clicks.
The same is true for film scanning. When I scan, I never use the auto-exposure feature because it’s assumption is that the file will look much better if the blacks and whites are clipped by a percentage and the tonal range is compressed to look punchy. I’m sure the assumption by ‘Auto-Exposure’ is to try to get the file looking strong as soon as possible. But it’s a clumsy way to work.
Once it’s baked in, it’s baked in. Working with a badly exposed film scan won’t get me anywhere.
“I am often trying to keep the contrasts low and sometimes the mid point of the levels command is pushed to the far right to brighten up the exposure while maintaining low contrast.
In summary, going for the “let’s get the image looking close to where we want” approach at the beginning of RAW conversion is , in my view, bad practice. There is nowhere to go after you do this. The cake is baked before you got the chance to do anything with it.
“Your approach should be for local contrast adjustment. By applying contrast selectively to areas of the image you maintain smooth tones while introducing the perception of punch in the image.
You need to have latitude in your file to leave areas of it soft and be able to punch up the contrast where you feel it’s needed. Applying global contrast in one swoop may feel like you’ve got to where you need to go, but you do so at the cost of sabotaging areas of the picture that need a more delicate approach.
It’s just plain clumsy, a bit like the spray-and-pray attitude of firing the shutter and hoping that one image will be a good keeper. Image editing is a skill. It’s an art. It’s just as important as image composition out in the field, and an area that with the wrong approach can kill fine images.
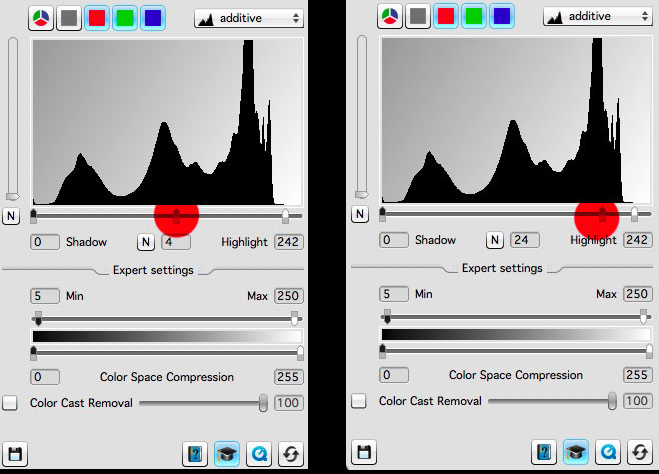
New e-Book Printing Masterclass
For those of you who do not follow my monthly newsletter, a few days ago I published a new e-book about printing.
If you’ve been following my blog for some time, you will know that I don’t believe that images are truly finished until they have been printed well. In other words, printing is the final verification stage that you can do. A well calibrated and profiled monitor can only take you so far. As the American photographer Charlie Cramer says ‘ If it looks good on a monitor, there’s no guarantee it will look good in print, but if it looks good in print, it will look good on a monitor’. So we should all be printing.
Maximum white pixel count problem
If you keep using the same camera for more than 4 or 5 years in snowy locations, you’ll eventually encounter the dreaded “maximum white pixel count reached” message. Once you reach this point, your camera will no longer be able to record snow any more.
It’s the error message that all keen winter shooters should dread, because it signifies that the camera has been subjected to an unhealthy amount of RGB 255,255,255 scenes that all the white pixels have been used up.
That means no more Lofoten. No more Iceland, and no more Hokkaido.
It also means no more lone-tree-snow scenes.
As you can imagine, this last point personally caused me a great deal of panic.
There are so many hapless photographers out there using a camera that is effectively a time-bomb. With each actuation, with each shutter press fired in a snow scene, they are slowly marching their camera towards a snowy demise.

A hapless bunch of photographers. Unknowingly, their cameras, all heading towards a snowy demise.
It’s certainly been a costly exercise for me. After each winter has passed, my digital cameras are often ready for the bin. That is, until recently.
There is a solution
To avoid your camera ever reaching white-pixel burn out, some photographers are advising to turn the exposure compensation to minus one (-1).
The reasoning is that this will ensure that your camera never uses any white pixels. At all. Which is great because you’ll completely avoid the possibility of ever running out of them.
The downside is that your pictures may suffer from being slightly dull. If you feel your images look a little dark after using this solution, I’ve found that turning the brightness dial of my monitor clockwise by a third can help a lot. More than you can imagine.
Parting thought
White-pixel-death is going to become a bigger problem in the years to come. As winter photography rises in popularity, camera manufacturers are going to have to think long and hard as to whether it may be worth setting the exposure compensation to minus one as a factory default.
I’ve even heard some rumours that some cameras may be released as special snow-editions. These models are essentially packed with twice as many white pixels as the standard models.
It’s early days yet, but it seems there may be a solution to keeping me happy shooting my lone-trees and white snow scenes for many years to come. Until a permanent solution is found, I’d advise we all just continue to work with exposure compensation set to minus one, and if that isn’t possible, shoot any snow scenes at night time when it’s dark.
Printing's role as the final stage in image verification
Back in the days when I didn’t print, and asked a pro lab to do it for me, I always had a nagging feeling that I’d lost control of my baby.
I’m a self-confessed control freak when it comes to what I do. A few days ago I wrote a blog post about appetite because I think I know appetite well: whatever I get into, I never seem to get into it in half measures.
Knowing this about me, you may be surprised to find out that at the beginning of my photographic journey, I often got my images printed by a lab. Indeed, I only started printing about 10 years ago.
For a long time I shied away from tackling what seemed like a formidable mountain because colour management was like a black art to me.
So I stayed away.
I’ve been extremely fortunate to have this blog. It has allowed me to meet people who have helped me and I put out a request about a decade ago for some help and suggestions about printing. Not one person left an entry on the blog, but instead chose to email me privately about it. The emails usually had this format to them:
“I don’t want to get flamed for my opinion, but this is how I do printing”.
It seemed that printing was a religion and to say you had a different way of doing it to someone else’s way was often contentious. A point of view is just that, and yet I am often surprised that we feel threatened when someone has a different view from ourselves.
Well, I welcomed the input but the message I got from the replies was this: everyone has their own way of working.
I doubt things have changed much in that regard over the past decade. There is still a lot of ways you can slice an onion, and there is always going to be a huge amount of fact vs personal preference.
So it’s now a decade further on, and I feel I know a thing or two about printing now. Indeed, I feel that everyone who loves photography should print. For one very simple reason: to validate your edits.
Even with a well calibrated and profiled computer monitor, I have learned that I cannot 100% trust it. I think it has something to do with how the eye interprets transmitted light compared to reflected light.
The fact is: I often notice areas that need further work when I study a printed version of an image. Stranger still, I often find that once I notice the error on the print, I can now see it on the monitor also. But the opposite is not true.
So printing is your last verification stage, and to paraphrase the wonderful Charlie Cramer :
“images that look good on a computer monitor aren’t guaranteed to look good in print,
but good prints are guaranteed to look good on a computer monitor”
Well, the issue for most who don’t print is: how to get started? It seems like such a black art. Yes, it is difficult to get started. There is so much contradictory advice out there. There is no one single way to do this correctly (even if I think my process is good).
I think this is why I’ve chosen to attempt to write an ebook about it. If I can reduce the information down to what you need, rather than getting too lost in the technology, then maybe I might be able to help you get a head start with this. I’ll see how it goes, but so far I’m feeling good about how much I’ve written. I think it’s coming together really well.